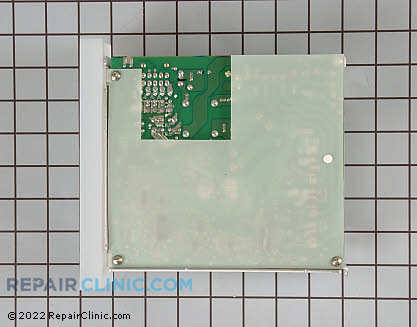
In this thrilling excursion into Appliantological Excellence™, Samurai Appliance Repair Man takes you deep inside the belly of the beast to discover why the main motor on a Frigidaire front-load washer would not run in tumble or spin. The Samurai was running a service call as The Appliance Guru, his real-life appliance repair service bidness.
Your Precious Words:
We have a loud roaring noise as the washer goes through the spin cycle.
Well, Joe, I gotta tell ya, pilgrim: you gots what we professional appliantologists call “bad drum bearings.” The roaring noise in spin is a definite clue. Here’s how to confirm:
Generally not worth repairing unless a) it’s under warranty or b) you’re gonna do all the work yourself (and maybe get the $500 part from Whirlpool for free– no guarantees on that!).
To learn more about your washing machine, or to order parts, click here.
Your Precious Words:
Trying to find out how many watts it is. Its a little 1988 machine that came in a little camper I bought. It works but I can’t find any info on it and am wondering if technology is better or safer now. Thanks for helping, Jan
This is a perfect application for the Kitt-A-Watt meter! It’s a simple device that plugs into any standard 120v outlet that you plug your 120v appliance into, such as your microwave oven, and then read the power consumption right there on the digital display. Sounds expensive but it’s not! The Kill-A-Watt meter is less than $30 and comes with a one year warranty if purchased right here.
To learn more about your microwave oven, or to order parts, click here.
Join Samurai Appliance Repair Man on this exclusive guided tour through the Guru Mobile– the fixit vehicle that he does real-life appliance repair service calls in.
For awesome appliance repair service in the New London – Greater Lake Sunapee Region of New Hampshire, call The Appliance Guru: http://applianceguru.com
For expert appliance repair help and to buy appliance parts, click on over to the Samurai Appliance Repair Academy at http://appliantology.org
My parents are looking to replace their Kenmore slide in range which is now 10+ years old and have asked me to research brands/prices of electric ranges. They prefer Kenmore, but which brands are the higher end quality while still staying in their $800 budget? Any suggestions on brand comparison sites?
Thanks for your time and Happy Valentine’s Day!
Sincerely,
Araceli
Click the play button below to hear my enlightening and inspiring reply:
Your Precious Words:
when I put the clothes on a cold wash it does not work, but it will work on hot . I checked line for clogging it was clear and I checked the cold water from house it was working I am wondering maybe if it is a Sensor ? I hate maytag they really Sux . thank you so much
A common problem with refrigerators is the appearance of various forms of water in places where it shouldn’t be. Examples are: water at the bottom of the freezer and dribbling out the door in a side by side refrigerator; fuzzy frost built up on the back wall inside the freezer compartment; moisture on beer bottles and the side walls inside the refrigerator compartment (also called the Beer Compartment); solid slab of ice on the bottom of the freezer compartment.
In each of these examples, we’re dealing with water that’s out of place. Water in a refrigerated space can take on three forms: ice, frost, and condensation. Which of these forms you see, along with where you see it, are important clues to help you zero in on the needed repair.
Condensation problems will appear as “sweating” on jars and bottles and sometimes even on the sidewall in the refrigerator compartment. Condensation is caused by water vapor condensing into a liquid as it hits the cold surfaces inside the refrigerator. When you see this, it means outside, humid air is getting inside the refrigerated compartments when and where it shouldn’t. So, you’re looking for bad gaskets, doors not closing properly, or doors being left open from carelessness.
Ice refers to liquid water that froze into a solid. This sounds obvious but it’s an important distinction from frost, also known as rime ice, that fuzzy looking stuff that is formed when water vapor condenses directly into a solid. The important point here is that ice and frost are the effects of two completely different underlying causes.
If you see smooth or solid ice in a freezer, then you know you’re really looking for liquid water in places where it shouldn’t be (that ended up freezing): clogged condensate drain in the drip trough below the evaporator coil; ice maker fill tube leaking or out of place; ice maker mold leaking.
If you see frost or rime ice in a freezer, then you know you’re really looking for water vapor that’s getting into the compartment. How does water vapor get into a refrigerator? It comes in with the outside air. In most cases when you see frost in a freezer, you’re looking for an air leak: bad door gaskets or doors not closing all the way. This video shows an extreme example of rime ice all over the contents inside a freezer:
Sometimes, you’ll see both ice and frost appearing together in a freezer which can make diagnosis tricky. In this video, I walk you through an example of such a case and I explain the failure sequence:
A special (but common) case for diagnosing frost in a freezer is when you see frost accumulated on the evaporator coil or back wall inside the freezer that covers the evaporator coil. This indicates a defrost system failure (defrost terminator stuck open, burned out defrost heater, bad defrost timer (on older units) or adaptive defrost control (ADC) board).
The reason rime ice forms on the evaporator coil in the first place is because the coil operates at a temperature of -20F. At that temperature, water vapor that contacts the coil will condense and freeze directly into a solid, forming rime ice. Every few hours the defrost system should kick in and melt that ice, because if it’s allowed to accumulate it will eventually act as an insulator, preventing the air from contacting the evaporator coils and getting cold. The resulting problem would first be seen as a warm refrigerator compartment and, if allowed to continue, eventually the freezer will also get warmer than normal (normal = 0F). Rime ice accumulated on the inside of the back wall in the freezer will often be seen at this point.
This melted rime ice has a special name: condensate. (Not to be confused with condensation, although the words are similar, they arise from two different causes.) Condensate refers to the water that gets melted off the evaporator coil in the freezer compartment during the defrost cycle. This condensate drips onto the condensate drip trough below the evaporator coil and drains out the condensate drain– a hole in the condensate drip trough– through a tube to the drain pan placed down by the compressor where it eventually evaporates due to the combined action of the compressor heat and condenser fan motor.
This video shows a freezer with extreme rime ice buildup on the back wall inside the freezer due to a defrost system failure:
If you need expert, interactive help in troubleshooting and repairing your refrigerator and service manuals, become an Apprentice at the Appliantology Academy ==> http://apprentice.appliantology.org/
You can find whatever appliance part you need through the parts search box at www.Fixitnow.com. No harm in buying and trying with our 365-day, no-hassle return policy, even on electrical parts that were installed!
Subscribe to our FREE, award-winning newsletter, Appliantology: The Oracle of Appliance Enlightenment ==> http://newsletter.fixitnow.com and download your free report on appliance brand recommendations! Every issue is jam-packed with appliance repair tips and inside information direct from the Samurai’s fingertips to your engorged and tingling eyeballs.
As the temperatures drop, folks all around the country are firing up their furnaces to keep out the cold. This issue of Appliantology offers you some tips for keeping your furnace running at peak efficiency and some resources for repair help and parts in case your furnace breaks.
Replace Your Furnace Filter Now
This is the single most important and easiest thing you can do to keep your furnace running right.
One of the biggest complaints with forced hot air furnaces is that air inside the house can become laden with dust mites and micro allergens from the recirculated air. You can cut way down on these allergens and breathe easier if you replace your furnace filter with a high-efficiency, micro allergen reduction filter. More on that later. First, here are…
Three Reasons to Change your Furnace Air Filter Regularly
1. Prolong the life of your furnace.
Air filters prolong the life of your furnace by keeping harmful particles out of the blower motor and heat exchanger. The blower motor can burn out if not kept clean and costs more than $200 to replace. Additionally, by not changing your filters every month, you can do the same damage to your unit’s motor by restricting the airflow needed to prevent the motor from being overworked. Considering the potential costs of repairs, filters are very inexpensive.
2. Cut down on your energy cost.
The second reason for changing your air filters regularly is to cut down on your energy cost. A dirty air filter can increase your energy cost by 35% by causing the furnace to work harder and run longer to maintain the desired temperature.
3. Promote better air quality in your home.
The third reason to change your air filters regularly and upgrade to a higher-grade filter is that it promotes better air quality in your home. Replacing your filter on a regular basis will cut down on airborne particles that can aggravate allergies and carry viruses.
It’s important to note that all filters are not created equal and there are several different types of filters to chose from. How do you chose the right one for you? I’m glad you asked…
Types of Furnace Air Filters – How to Choose One Right For You
Typically, air filters are rated by the size of the particles they can remove. Most good furnace filters can easily remove particles larger than 10 microns in size, but the best filters are able to remove particles smaller than 3 microns. One micron is one millionth of a meter or approximately 1/25,000 of an inch. For comparison, a human hair is about 70 microns thick.
Most pleated filters have a performance rating that is assigned a number to indicate the level of effectiveness. Generally the higher this number is, the higher the performance of the filter.
Different manufacturers use different performance ratings but 3M’s MPR rating is emerging as the industry standard. MPR stands for Micro-particle Performance Rating. The 3M MPR rating focuses on the smallest and most troublesome particles – those between 0.3 and 1.0 Microns in size. Generally speaking, a filter with an MPR of 1000 is twice as effective at removing those tiny particles as a filter with a 500 MPR.
The flat panel fiberglass filter, such as this one,is the lowest cost filter available under $1.50 retail each. This is the least effective filter in terms of particle filtration, but is good for protecting equipment if changed regularly. Flat panel filters are designed to catch only larger particles, allowing smaller particles to pass through. Flat panel filters have no performance rating due to their low efficiency. The recommendation is to replace flat panel filters every 30 days.
The second type of filter is the basic pleated filter like this 3M 300 Dust Reducing filter. Compared to flat panel filters, the pleated filter is 5 times more effective in catching the airborne particles than flat panel filters allow to pass through. The retail for a basic pleated filter is under $5.00 each. Because they catch smaller particles, they are more efficient than fiberglass filters. They reduce energy costs by keeping your unit cleaner, as well as keeping your air quality at a higher standard. Basic pleated filters, based on testing of residential systems, need to be replaced every 30 days. The MPR rating on basic pleated filters ranges from 300 to 500.
Electrostatic filters have media that is charged with electric current during the manufacturing process, allowing the filter to attract smaller particles; much like a magnet attracts metal. 3M electrostatic filters have both positive & negative charges to attract dust no matter which charge it holds. Electrostatic filters are up to 18 times more effective than flat panel filters and have MPR rating of 600 to 2200. The average retail on this type of filter is from $7.86 to $ 10.96 each. These filters are designed to be replaced every 90 days. Considering the lifespan of these electrostatic filters, they not only do a better job of cleaning the air in your home but the cost less on a monthly basis because they don’t have to be changed as often.
Our friends at RepairClinic.com, the premiere online source for appliance parts, now offer furnace parts for Carrier, Lennox, and York with the same awesome, hassle-free one-year return policy that they offer on appliance parts! To shop for furnace parts, click here.
For your convenience, here are direct links to the three most common types of furnace parts that you’ll need to replace:
Running Your Oven’s Self-Clean Could Mean Cold Turkey on Thanksgiving Day
Professional Appliantologists mark the seasons by the mix of service calls we get. We’re just now coming out of refrigerator season and getting into the thick of oven season. Every year, in the few days leading up to Thanksgiving Day, I can always count on a ton of last-minute, panicked service calls.
“Why is that, Samurai?” you ask.
Well, I’ll tell you. For some reason, people always wait until the last few days before Thanksgiving Day to run the self-clean feature on their oven. Some folks may be thinking the oven should be clean before they cook the communal turkey in it. Others may be anticipating the meddlesome mother-in-law oven inspection. The problem is not “why” you run the self-clean, but “when.” Lemme explain…
During self-clean, the temperatures inside the oven cell can exceed 900F. This is very stressful on the oven’s sensor, door lock assembly, and electronic control board. If anything is on the verge of breaking, it will usually happen during the self-clean cycle. This means that if you think you’re going to run the self-clean cycle in your oven, don’t wait until a few days before before Thanksgiving Day, when you’ll need it to cook that big turkey for a house full of guests, do it now! Then, if something does break in the oven, you’ll have time to get it repaired and won’t end up in a last-minute panic trying to get your oven fixed.
According to Rob Marriott, National Technical Manager for Dacor, a manufacturer of high-end ranges and ovens, “If you’re going to use the self-clean feature, use it a lot or don’t use it at all.” The reason for this is that the most common thing to fail in an oven during self-clean is the door lock assembly. On many modern ovens, the door lock assembly has a little motor that locks and unlocks the door. This motor is controlled by the oven’s electronic control board (the control panel with the digital display). If this motor isn’t used on a regular basis, the accumulated grease that collects in the motor during normal use will coagulate and harden during self-clean and bind the motor so that it can’t unlock the door.
The oven temperature sensor is also stressed during self-clean and is the second-most common thing to fail during or after running the self-clean cycle. Less commonly, yet still prevalent, the oven’s electronic control board can fail due the extra heat it receives during self-clean.
Personally, we never run the oven self-clean cycle at the Samurai’s dojo. But, I understand there are lots of valid reasons why someone would want to, two of which I mentioned above. So, if you’re planning on running the self-clean in your oven, here are some…
Get parts FAST– even overnight and Saturday delivery– for any brand and model of oven with a one-year return policy. Just enter your model number in the search box at the top of the page at Appliantology.org.
This picture shows you the most common places to look on your oven or range to find the model number tag.:
All Master Appliantologists acquire advanced repair katas during their years of hand-to-machine combat with malfunctioning appliances. Examples of how some of these Special Weapons and Tactics are used in appliance repair include:
– diagnosing elusive or subtle problems
– gaining insight into the condition of a component and assessing its likelihood of future or imminent failure
– testing specialized components to see whether they’re good or bad
– facilitating or implementing a particular repair
In this special issue of Appliantology, I’ll reveal some of my personal, favorite SWATs that I use on some service calls which can also be useful for amateur appliantologists working on their own appliances.
The Hand-Held Steamer
Good for all kinds of household tasks such as cleaning and disinfecting, the mighty hand-held steamer is indispensable for some appliance repairs. For example, defrosting a frosted-up evaporator coil or clearing a clogged condensate drain in a refrigerator. In fact, since I’ve been using my steamer, I can’t imagine doing these types of repairs without it! It’s makes quick work of these messy jobs.
Take a look at the icy mess in the freezer in this video; this repair would have taken over two hours without a steamer but, with the steamer, I did this entire repair in less than an hour!
You can buy the very same steamer I used in the video at Amazon for $15 less than what I paid for it! http://amzn.to/OPggAo
Refrigerator Temperature Data Logger
Sometimes I run into situations where I need a way to log temperature data inside a refrigerator for at least 24 hours to get a clear picture of what’s going on inside that box. A couple of examples are:
1. Customer complains of warm temperatures in the beer compartment of her Maytag side-by-side refrigerator but says that the freezer compartment is fine (and we know how accurate customer temperature measurements are… NOT!). You arrive and measure the freezer temperature using your infrared temperature gun and get readings that vary from +5F to +12F. Marginal temperatures for a freezer but was that because it was just coming out of a defrost or off-cycle? Was the door recently opened just before you got there? You don’t know, and all you have is the one data point: the measurement you just made. Wouldn’t it help your diagnosis if you could put a data logger inside the freezer for a day or so and then look at a graph of the actual temperature measurements inside that freezer over time?
2. Customer complains that the freezer temperature in her GE built-in refrigerator fluctuates over time from 5F to 10F to 20F and then back to hard freeze. You maybe even verified this yourself (if you spent enough time there to do this). But how much time in a typical service call day do you have to babysit freezer temperatures? And you still wouldn’t be able to gather enough temperature-time data points to discern whether or not there’s a pattern to the fluctuations which could then be correlated to some other process in the refrigerator (defrost cycles, compressor cycles, etc.). Even seeing that there is no pattern, that the fluctuations are random, is also helpful because it could indicate something as simple as the door not being closed all the way (hinge adjustment issue?).
In cases like these, you just gotta be able to look at the temperature inside the compartment over an extended period of time. Enter the Supco LT2 LOGiT Dual Channel Temperature Data Logger. Here’s a video of me showing you how to set up and use the data logger:
Here’s the link where you can buy the Supco LT2 data logger at Amazon: http://amzn.to/WLMe2t
and you’ll need this software kit to get the data to your Windows PC, also available at Amazon: http://amzn.to/S3bmhb
Special Meter Technique for Testing a Microwave Oven High Voltage Rectifier
You probably know how to use a multimeter to make simple electrical measurements, like voltage and resistance. (If not, then see this page at my blog for a simple tutorial on using a multimeter: http://fixitnow.com/wp/2004/12/18/appliance-repair-revelation-making-basic-electrical-measurements/ ) But sometimes, you have to do a voltage test in an unusual way to check whether a component is good or bad. A common example of this is testing the high voltage rectifier (also called a diode) in a microwave oven. This is an inexpensive, common-fail part that will stop the microwave from heating if it breaks.
For most rectifiers, you test ’em by simply measuring the resistance and then switching the leads and checking it again– should read open (high resistance) in one direction and closed (low resistance) in the other. But microwave high voltage rectifiers are a special case because their internal resistance is so high that you’ll just read open in both directions and you can’t tell whether it’s good or bad that way. So, to test them, you have to actually do a voltage test using a 9 volt battery. This esoteric kata is fully revealed in this video:
The Mega-Ohm Meter (or “Megger”)
One of the common failures with a refrigerator compressor is that the varnish insulation on the motor windings starts to break down and then begins leaking current to ground. If the current leakage is large enough, you can deduce that this is happening by measuring compressor current draw– an abnormally high reading combined with the compressor running hotter than normal are sure signs that the insulation on the compressor motor windings is breaking down and the compressor is not long for this world.
Or you could directly test the compressor motor windings using an instrument called a mega-ohm meter, or “megger,” to directly test the integrity of the winding insulation. I use an inexpensive megger that cost less than $100 (back when I bought it a million years ago– it’s not much more than that now). This video shows using a megger to check the compressor motor:
You can buy the updated version of the Supco megger that I used in the video at Amazon: http://amzn.to/R8LDGd
The Clamp-On Amp Meter
Measuring current flow through a circuit or component is a powerful troubleshooting tool to have in your appliance repair SWAT bag.
For example, on a Bosch dishwasher that’s not heating, a quick current measurement a few minutes into the cycle will tell you whether or not current is flowing through the heater. If not, yet the control board is supplying 120 volts to the heater circuit, then you know the problem lies in the heating circuit itself because something in that circuit (heater, NTC, etc.) is open, stopping current flow.
Other times, the only way you can tell whether or not a part is bad is by measuring the current flow throughout that part. For example, the ignitor in a gas oven glows but the bake burner never fires up: is it a bad gas valve? Bad ignitor? Flip a coin and guess? No need to guess if you can make a simple current measurement. (Note that an ignitor can glow and still be bad– in fact, this is the most common case.) This video shows you how:
I prefer Fluke meters and I own two Fluke amp meters. Here’s the Amazon link to the one shown in the video, the Fluke T5, which is well under $100: http://amzn.to/Rd5pPh
And I also own the Fluke 322 which is a little more expensive (still under $100) but also more versatile: http://amzn.to/RIsQPf
And Hey!…
You can find whatever appliance part you need through the parts search box at Appliantology.org:
No harm in buying and trying with our 365-day, no-hassle return policy, even on electrical parts that were installed! And now shipping to Canada, too!
I frequently make videos when I’m on service calls and upload them to YouTube. Keep up with my latest uploads by subscribing to my YouTube channel: http://www.youtube.com/samurairepairman
Reading this online and want your own, personal copy of Appliantology delivered to your inbox in a discreet brown wrapper? Subscribe here: http://newsletter.appliantology.org/
The Wisdom of Master Samurai and Appliantologist, Miyamoto Mushashi
One thing I’ve learned after years of being an appliance repair Samurai is how to pick your battles. You don’t want to engage in hand-to-appliance combat with an appliance that’s not worth repairing, such as with a front loading washer with a failure in either the inner basket or outer drum.
An inner basket failure is a corroded or broken drum support spider assembly, like this one:
See this page for examples and further explanation.
The most common outer tub failure is a bad drum bearing, but it can take other, more subtle forms.
“But, wise and besotted Samurai,” you ask incredulously, “what is it about these particular failures that makes even you, a seasoned veteran of the Appliance Wars, slink away from these battles like a ninja in the night?”
Ahh, Grasshoppah, in the words of my venerable Master, Miyamoto Mushashi, “You must understand that there is more than one path to the top of the mountain [of Appliantology].”
The parts alone for these repairs can run well over $500 and can take several hours to repair, sometimes requiring a second man. And then there are other things that can fail in the washer at a later time: motors, motor control boards, door boots, etc. So I ask you, Grasshoppah, would you rather spend your precious time, blood, and money resurrecting a machine that has given up the will to live or would you rather spend about the same amount of money and far less time purchasing a new washing machine?
What appears to you as running away from a fight is in reality another path to the top of the mountain of Appliantology. And to get there, you must learn to, “Perceive that which cannot be seen with the eye,” as my Master taught.
To help you “Perceive that which cannot be seen with the eye,” I have assembled three videos from my various encounters with these types of catastrophic failures in front-load washers to help you discern the situation and make a wise decision. Watch and learn, Grasshoppah…
Diagnosing a Broken Drum Support Spider
In this first video, you’ll hear the noise that a broken drum support spider makes at low RPMs. The customer called in with the complaint that the drum would bind while running, stalling the cycle and causing the control to flash an error code. Watch and learn the distinctive noise this particular failure makes:
Diagnosing Bad Drum Bearings
Bad drum bearings in a front loading washer can manifest in a variety of ways. In this case, the customer called with the complaint that her Whirlpool Duet (Kenmore-labelled) washer was stopping during the cycle and, upon further questioning, also showing the F06 error code. The F06 error code is a tachometer error which, as it turns out in this case, was actually being caused by the drum bearings binding and interfering with the drum rotation. I could hear the bad drum bearings when I ran the washer in a spin cycle.
Bad bearings can make a variety of noises depending on exactly how they are failing; you could hear a roaring noise like a jet engine or a clanking noise like in this video. But they all have one thing in common: they originate from the back of the washer and manifest audibly during the spin cycle. Had she reported that the washer was making this noise during spin, I could have saved her a service call fee!
BTW, this particular washer is only 5 years old. Her daughter has the exact same washer, same age, and reports the same problem. An all-too common story with the Whirlpool Duet line of front loading washers.
Diagnosing Outer Tub Failure
This video is a great illustration of why it’s so important to properly identify cause and effect when troubleshooting. In this case, what the customer saw as the problem, a twisted door boot (or gasket), was actually an effect of an underlying, catastrophic cause: outer drum failure. You want to make sure you’re fixing the actual cause and not the effect.
Oh, Canada!
Finally, after years of travail and miles of paper work trails, we are now shipping parts to our cool neighbors in the Great White North! Same great prices, same awesome one-year, hassle-free return policy as we’ve always offered our customers here in the (once upon a time) Land of the Free! Come git you some using the Smart Parts Search Box at The Appliantology Academy:
Wisdom from The Oz Man
Heed the wisdom of The Oz Man and don’t let the beauty of this Autumn pass you by: get up off your duff, get outside and take a hike!
A long, long time ago, people did things like read books instead of surfing the Internet or had thoughtful discussions about complicated topics instead of yelling political slogans and sound bites at each other. Most folks also had at least a conceptual understanding of the process of troubleshooting: the logical, step-by-step progression of tracking down the cause of a problem.
To troubleshoot an appliance, you first need to have a basic understanding of how that appliance is supposed to work both from the operator’s standpoint and how the components inside are supposed to work together. In other words, to figure out what’s wrong, you first have to know what “right” is. Then begin troubleshooting right at the problem and step through, checking inputs and outputs, whether mechanical or electrical.
For example, an oven electric bake element isn’t getting hot and is not visibly damaged. The element needs 240 VAC to get hot, 120 VAC at each of its terminals. The voltage at the terminals is controlled and delivered by different circuits or components inside the oven. Many people would just immediately replace the element, not even considering how the element works or checking to see if it’s getting the voltage it needs to operate. Maybe they get lucky and fix the problem, but that’s not troubleshooting. That’s changing parts like a monkey.
Appliance repair servicers who practice their trade like that are not technicians or Professional Appliantologists; they are called “parts changing monkeys.”
Parts changing monkeys can cost you a lot of time, frustration, and money.
Beware the Parts Changing Monkey!
What’s a parts changing monkey, you ask?
He (or she) is someone who knows how to change out parts on your appliance, but doesn’t know how to actually troubleshoot the problem. Based on your problem description, he will change out the most obvious part involved and hope that fixes the problem. That works just often enough to get by in many repair situations, but there are other times it results in a major rip-off of the customer.
Here’s a repair saga where I followed up behind a parts changing monkey who never bothered to troubleshoot an overfilling complaint on a GE front-loading washer. He had replaced two parts without fixing the problem and was trying to convince the owner to replace a third. I was called in and quickly found the actual malfunctioning component that monkey-boy failed to even check. It’s not rocket science! You just need to have a basic understanding of how these machines work, and that information is readily available in posts like this:
Wisdom! Let Us Attend!
You can find whatever appliance part you need through the parts search box at The Appliantology Academy. No harm in buying and trying with our 365-day, no-hassle return policy, even on electrical parts that were installed!
I’m always uploading new videos to my YouTube channel of my real-life appliance repair adventures that I do in people’s homes. I film, produce, and upload all these videos completely from my iPhone so they’re not all professional and slick looking but they are enlightening. You can keep up with ’em by subscribing to my YouTube Channel.
Join Samurai Appliance Repair Man as he goes in batting cleanup behind a local parts changing monkey (PCM) who tried to fix a problem with a front loading washer that overfilled by blindly replacing parts, hoping to get lucky. Of course, he failed miserably but that didn’t stop him from charging the customer anyway. The customer called me out of frustration and desperation and, as usual, the Samurai delivers another appliance ass-whuppin’!
The other thing this video illustrates is the importance of understanding how the components inside an appliance are supposed to work together. How else can you troubleshoot? In this case, with the washer overfilling, starting troubleshooting at the water inlet valve is not a bad idea BUT what are you looking for? The PCM simply guessed and hoped to get lucky. But there’s no need to guess if you understand how the valve is supposed to work and can make a simple voltage measurement.
In this case, you would use your meter to see if the valve is still getting voltage when the drum was overfilling. If so, then the problem is NOT the valve, it lies in in the component that controls the valve. Here, the pressure switch controls the valve and this is the next thing the PCM replaced. But, again, there’s no need to guess because the switching function of the pressure switch can be tested using your ohm meter and gently blowing into the pressure tube to see if the pressure switch contacts change.
Actually, in the process of gaining access to the pressure tube to test the pressure switch, you would have discovered the chaffed pressure tube in the course of doing simple troubleshooting like a real technician and not just blindly thrashing about, throwing parts at the machine and ripping people off.
So, putting this all together, here’s a simple operational description of how these parts work together inside the washer:
As the water level in the drum rises, the pressure inside the pressure tube increases. This increased pressure is felt by the pressure switch which is calibrated to switch contacts at a specified pressure corresponding to a design fill level. The pressure switch, which was sending voltage to the water inlet valves during fill, then cuts voltage to the water inlet valves and the wash cycle begins.
Is that so hard to understand? How is it that someone who repairs appliances for a living does not understand this?
You can find whatever appliance part you need through the parts search box right here at Fixitnow.com. No harm in buying and trying with our 365-day, no-hassle return policy, even on electrical parts that were installed!
Subscribe to our FREE, award-winning newsletter, Appliantology: The Oracle of Appliance Enlightenment ==> http://newsletter.fixitnow.com and download your free report on appliance brand recommendations! Every issue is jam-packed with appliance repair tips and inside information direct from the Samurai’s fingertips to your engorged and tingling eyeballs.
The Appliance Guru provides prompt, convenient service in the following towns in New Hampshire: New London, Elkins, Wilmot, Springfield, Georges Mills, Sunapee, Mt. Sunapee, Newbury, Sutton, Bradford, Warner, Grantham, and the Eastman Community. Visit our website for more info and a discount coupon on your next service call: ==> http://applianceguru.com
… and I mean that in the most gender-inclusive way… Let us open our Appliantology Hymnals to the Seventh Law of the Prophecy, wherein it is written, on whatever they use to write prophecies with, that, “All leaks are visual.” Yea verily, greater truth hath never been uttered. Can I hear an, “Amen?” Well, how about a “Hello, Newman?”
This issue of the Appliantology epistle will show you in living color just how self-evident we hold these truths to be. The Samurai will reveal unto thee two example cases where this sacred Appliantological precept was applied to successfully locate and repair unusual, uncommon, even weird leak sources in washing machines. One case will be a front-loader and the other a top-loader. In both cases, the Seventh Law of the Prophecy is applied to successfully vanquish the leak.
Locating and Repairing a Mystery Leak in a Front-loading Washer
Watch with shock and awe as Samurai Appliance Repair Man ruthlessly ferrets out the source of a leak in a front-loading washing machine and then mercilessly repairs it.
Locating and Repairing a Leak in a Maytag Bravo / Whirlpool Cabrio / Kenmore Oasis Washer
In this excursion into appliance repair excellence, the Samurai shows you how to locate the source of a leak in a Maytag Bravo washing machine and how to fix it. In case you didn’t figure it out from the title of this post, the Maytag Bravo, Whirlpool Cabrio, and Kenmore Oasis washers are all the same machine so this sublime repair kata applies to all three.
Addendum to the Last Issue, “Get the Apprentice Advantage”
If you have ever contributed any amount to the United Samurai Beer Fund prior to July 30, 2012, you are eligible for a complimentary promotion to Merit Apprentice Appliantologist together with all the rights and privileges thereof. Just Contact the Samurai and tell him the email address associated with your Paypal account from which you would have made the donation and he will promote you. This is our way of saying “Mucho Domos!” for your love-offering of support in the past.