This is GE’s fancy-looking dryer with the see-through door, model numbers DBVH512, DCVH515, DHDVH52. If you need to get to any of the guts such as the heating element (electric models), gas burner (gas models), motor, belt, etc., this’ll hepya.
You’ll need to remove the top panel, control panel, and front panel to replace the belt. To go further into the belly of the beast for things like the gas burner, heating element, drum bearing, idler pulley, you’ll also need to remove the drum. Let’s take it one section at a time.
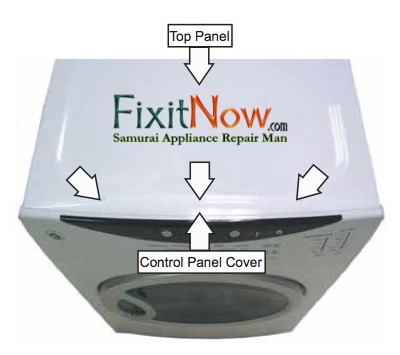
Top Panel Removal
If you just need to get to the power board, you’ll only have to remove the top panel. For most other innards, this will just be your first step.
1. Remove the three Phillips-head screws that attach the control panel cover. Pull the cover toward the back of the dryer. If the panel seems stuck in place, you can use a putty knife along the top seam between the cover and the control panel to gently pry it back.
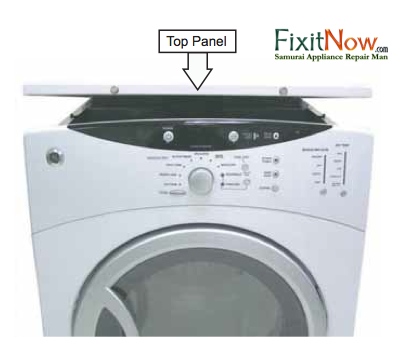
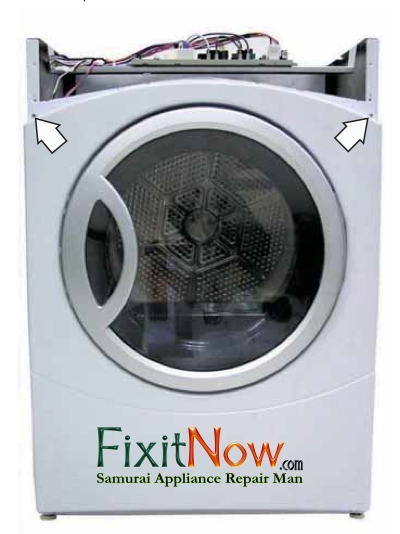
2. Remove the two Phillips-head screws that attach the top panel to the cabinet.
3. Raise the front of the top panel a few inches, then pull it forward to clear the rear tabs.
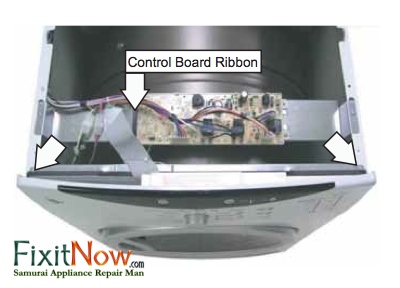
Control Panel Removal
After the top panel is removed, you’re ready to remove the control panel in just three easy steps:
1. Disconnect the control board ribbon from the power board at connection CN110.
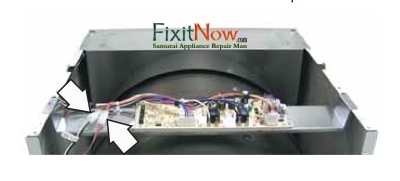
2. Remove the two Phillips-head screws that attach the top of the control panel to the cabinet.
3. Lift the control panel straight up and out.
Front Panel Removal
With the top panel and control panel removed, you’re ready to take off the front panel:
1. Disconnect the door switch wire harness and the sensor rod wire harness to the power board.
2. Remove the four Phillips-head screws that hold the front panel to the cabinet. You’ll probably need to raise up the front of the dryer and support it on a block of wood so you can get to the screws to remove ’em.
Drum Removal
Okay, so with the top panel, control panel, and front panel all out of the way, you’re now ready to remove the drum so you can get into the belly of the beast. Let’s do dis:
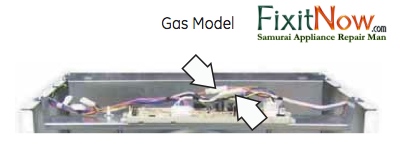
1. If you have an electric dryer, move on to Step 2. For gas models, disconnect the inlet control thermistor and the inlet safety thermostat wire harnesses.
2. Detach the front plastic wire retainer from the cabinet by squeezing the little tabs.
3. Remove the two Phillips-head screws that attach the power board bracket to the cabinet. Carefully place the bracket on the rear plate.
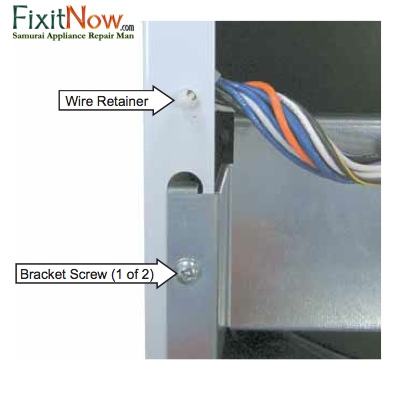
4. Remove one Phillips-head screw from each side of the cabinet, then gently spread the sides apart to provide clearance for the drum. Careful not to spread the sides too far or you’ll crease the sheet metal. Not a biggie, just a fine point of finesse for you aficionados out there.

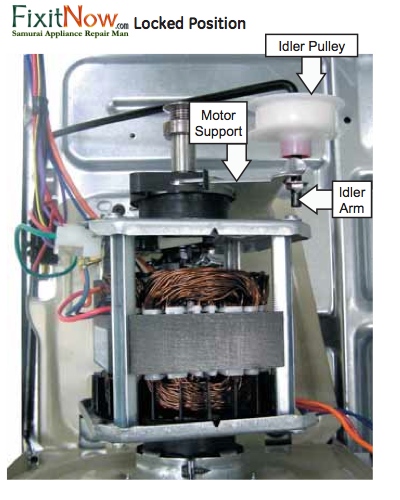
5. Remove the drive belt from the motor and idler pulley. Reach under the left side of the drum, push the idler pulley down and to the right, then lock the idler arm on the top corner of the motor support. Then remove the belt from the motor pulley and idler pulley. Guide the belt past the front of the cabinet base.
6. Using the belt as a handle, pull the drum forward and guide it out of the cabinet.
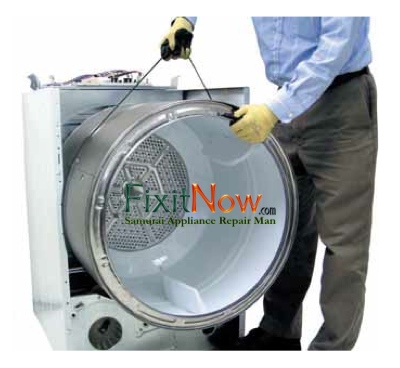
And there ya be!