Monthly Archives: June 2011

How to tell if you have a worn tub bearing or a broken drum suport in your front loading washer

Got a front-load washing machine that’s making a ruckus during spin and you’re trying to figure out what’s wrong? Best case scenario is a broken shock absorber or the washer is simply off balance. Worst case scenario is a bad tub bearing or broken drum support spider. Sublime Master KurtiusInterupptus in the Samurai School of Appliantology explains how to tell the difference:

Do this test…
open washer door and grab the top edge of the inner wash basket
push straight up on the basket while steadying the outer drum with your other hand
is there any lateral movement? Or is it tight and secure?
hope for the latter, because the former is the telltale sign of a worn bearing, a broken support spider or both…not worth repair if this is the case.

If all is good here, go around back and take off the cover. Look for a loose pulley on the basket shaft. (read more)

To learn more about your washing machine, or to order parts, click here.

How to troubleshoot an F28 error code in a Whirlpool Duet Sport washer

Example model number: WFW9200SQ00

The F28 error code will be accompanied by no drum movement. The drain pump may be inop as well.

Sublime Master Strathy from the Samurai School of Appliantology shares this kata for troubleshooting an F28 error code in a Whirlpool Duet Sport (also sold under the Kenmore label) washer.


OK … going by memory here.


– First ohm out your motor. You should have approx 6 ohms between 1-2,1-3 and 2-3. You should also get 120 ohms on 5-6 which is the tach on the motor. If that is good …

– Open up the little flap on the MCU board. Start a regular wash cycle and check for voltages at the MCU. On the pink wires you should get 120v. (With the wires connected to the MCU – don’t disconnect them to check the voltage.) On the connector with the little blue wires – you should have 5 vDC.

– If you are getting the correct voltages at the MCU and the motor ohms out good, then you have a bad MCU.

– If you are not getting those readings at the MCU, then check continuity on the blue wires and the 2 pink wires from the CCU to the MCU.

– If you have continuity on all wires and the connections look good, then you have a bad CCU.


Part links (click images for larger view and purchase info):

Motor Control Unit - Part #1257029
Motor Control Unit – MCU

Control Module - Part #1257028
Central Control Unit – CCU

To learn more about your washing machine, or to order parts, click here.

Tips for Removing a Stuck Tub in a Whirlpool Cabrio / Kenmore Oasis / Maytag Bravos Washer; OL error code

If you have a Whirlpool Cabrio / Kenmore Oasis / Maytag Bravo Washer that’s throwing an OL error code, the problem is most likely a stuck tub. If the tub isn’t free to float, it causes the motor to draw excessive current that generates the OL (over load) error code.

BTW, this problem is usually caused by using non-HE detergent or too much HE detergent in these machines, read more here. The excess detergent residue forms a cement-like gookus that builds up on the drive shaft and sticks to the outer tub. It can also kill the tub bearing in which case you’ll need to replace the entire outer tub assembly because the bearing comes factory assembled into the new tub.

Here’s the part link for the new tub assembly ==> Drum Assembly

To fix the problem, you’ll need to remove the outer tub and clean the gookus off the drive shaft. This Cabrio washer teardown guide will help with that.

The teardown will all go like a breeze until you get to the part where you actually need to pull the tub out of the cabinet. Then the hernias, dislocated spinal disks, and spleen venting begins. Here are some tips that’ll help you get the tub out:

Tips for removing a stuck tub in a Whirlpool Cabrio washer

To learn more about your washing machine, or to order parts, click here.

Misdiagnosing a cooling problem in a GE refrigerator: A hack job case study

dsiebler wrote:

Hello Samurai! I have a GE side x side fridge that is driving me crazy. Started not cooling correctly, nothing freezing on the freezer side. Repair guy replaced main board. He said the coils were only icing up to about the 3rd coil. Main board didn’t fix the problem, he came back out and charged the system with freon. That seemed to work for a week but the defrost cycle would still cause all ice in freezer to melt. But at least I was still happy that fridge was getting cold. Then, freezer stopped getting cold again. I changed the 2 thermistors in the freezer last night, pulled plug and let sit for 15 minutes. Turned back on and same thing. The first 2 or 3 coils start getting iced up and then defrost comes on and melts. Even if the defrost doesn’t come on it seems like the coils will not ice up. Any ideas on this one?

The appliance parts changing monkey who hacked on your refrigerator is exactly the kind of butcher who gives the venerable appliance repair trade a bad name. Let’s parse out the butcher’s blunders:

Repair guy replaced main board. He said the coils were only icing up to about the 3rd coil. Main board didn’t fix the problem…

If the evaporator coils– the coils in the freezer behind the inside back panel– were only partially frosted as you describe, this is a clear indication of a sealed system problem.

Early Stage Refrigerator Evaporator Leak

Most commonly, either some of the refrigerant has leaked out or the compressor has become weak. This has nothing to do with the muthaboard as both you and the parts changing monkey found out. Further testing would need to be done to determine what the exact problem is in the sealed system. But for most home refrigerators, sealed system work usually doesn’t make sense to do because of the expense involved in doing it right. Which brings me to the next piece of butchery:

…he came back out and charged the system with freon. That seemed to work for a week…

If the unit was really low on refrigerant, which seems like it may have been the case based on the short-lived improved temperatures, then it would have gotten that way due to a leak in the refrigerant tubing somewhere. So, simply adding more refrigerant is not repairing the problem at all and, in fact, is illegal under EPA regulations.

It is illegal to simply add refrigerant to a refrigeration system that has leaked without locating and repairing the source of the leak because the refrigerant will simply leak back out into the environment.

The correct procedure would have been to locate the source of the leak using various techniques, repair the leak, pull a deep vacuum on the system and then recharge it with the correct refrigerant in the amount specified on the model number tag.

Now you see why I said that the expense of doing sealed system work correctly (and legally) usually doesn’t make sense for most home refrigerators unless it’s a built-in unit, like a Sub-Zero, where you paid so much that you’re married to it. For most other types of home refrigerators, if there’s a sealed system problem, that’s usually a terminal event and it’s time to go shopping.

If a real Master Appliantologist were on the job and saw the deficient frost pattern on the evaporator coils, he would first verify that the condenser fan was running at full speed and that the condenser was clean. If both of those things were true, he would have recommended that you junk that box and go buy a new one, no muthaboard, no “recharge.” The only expense would have been the basic service call fee.

To learn more about your refrigerator, or to order parts, click here.

How to fix a GE Profile “Hydrowave” washer that doesn’t agitate properly but spins and drains okay

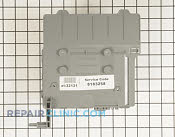
These GE Hydrowave line of washers, example model numbers WPRE6100 and WHRE5550K, use an inverter board to vary the speed of the motor. Instead of transmission, it uses a mode shifter. More on both of these later.

One of the common failure symptoms in this machine is that the agitation cycle gets messed up but the spin and drain continue to work normally. During agitation, you may hear a loud howling or clunking noise or the tub may be rotating with the agitator, causing overflows. The direction of the tub rotation during agitate may change between lid openings. All of these are indications of a bad Mode Shifter.

For the tech junkie out there, here’s an overview of how the mode shifter works:

Shaft and Mode Shifter Overview

The shaft and mode shifter assembly consists of the shaft and tube, mode shifter cam, and mode shifter coil. It operates in 2 distinct modes, spin and agitation. The shaft and tube transfers power to the wash system.

Motor power is transmitted to the shaft and tube from the drive belt to the drive pulley.
The drive pulley is attached to one end of the agitator shaft and the agitator is attached to the other. The tube is fixed to the washer basket at all times.

The mode shifter changes the shaft and tube from spin to agitation. In agitation mode, the tube is fixed to the platform and the agitator shaft rotates freely. In spin mode, the agitator shaft is fixed to the tube and both rotate together.

Mode shifter coil energized for agitate mode; cam teeth disengaged from drive pulley.
(Teeth engaged)

Mode shifter coil de-energized for spin/idle mode; cam teeth engaged in drive pulley.
(Teeth Dis-engaged)

Mode Shifter Operation – Agitation

The mode shifter is controlled by the motor inverter circuit.

When the washer starts the agitation cycle, the inverter energizes the mode shifter coil. The magnetic field of the coil lifts the mode shifter cam, disengaging it from the drive pulley.
Without the cam engaged, the drive pulley rotates only the agitator shaft.

At the beginning of the agitation cycle, the inverter energizes the mode shifter coil with 135 VDC (PWM) for approximately 18 seconds. This high voltage pulls the mode shifter cam up from the drive pulley.

During this time, the motor also rotates clockwise and counterclockwise in short strokes to ensure the mode shifter cam has been released from the drive pulley. This operation is called the Mode Shifter Agitate Program.

It is normal to hear metal-to-metal “clunking” sounds during this time as the cam and drive pulley disengage.

The washer runs this program when the agitation cycle first starts, when power is restored if lost during agitation or when the user restarts the washer if paused.

Once the Mode Shifter Agitate Program has completed (18 seconds), agitation begins. During agitation, the inverter continues to supply 30 VDC (PWM) to the mode shifter coil. This voltage is sufficient to hold the mode shifter cam away from the drive pulley throughout the remainder of the agitation cycle.

The inverter motor controls the speed of agitation. The agitator stroke rate is approximately 30 strokes per minute. This rate is the same for all cycles.

The speed of the motor controls the arc. At fast speed, the arc is approximately 360 degrees.
At slower speeds, the arc is substantially less. It is the distance of the arc that determines normal or gentle wash cycles.

Mode Shifter Operation – Spin

At the beginning of the spin cycle, the inverter runs a short sequence (approximately 30 seconds)
to make certain the mode shifter cam is engaged with the drive pulley. The inverter does not supply voltage to the mode shifter coil during this sequence. Since the coil is not energized, the spring loaded cam drops down into the teeth of the drive pulley.

During this time, the motor also rotates clockwise and counterclockwise in short strokes
to ensure the cam has engaged with the drive pulley. This 30 second operation is called the Mode Shifter Spin Program. It is normal to hear metal-to-metal “clunking” sounds during this time as the cam and drive pulley engage.

Notes:

If the washer is paused while in agitation, it is NORMAL to hear sounds for an additional 30 seconds as the inverter control runs the Mode Shifter Spin Program to de-energize the coil and enter a pause state.

If the washer is in agitation and power is lost, the inverter control will run the Mode Shifter Agitate Program when power is restored.

If the washer is in spin and power is lost, the inverter control will run the Mode Shifter Spin Program when power is restored.

To help prevent out-of-balance conditions, the last 10 seconds of agitation on certain cycles will be short, fast strokes to help redistribute the clothes load prior to entering the spin cycle.

Checking the Mode Shifter

Most of the problems we see in the field with the Mode Shifter are electrical rather than mechanical. The Mode Shifter has a coil inside of it with a two-wire harness, a red and yellow wire, that supplies power to the coil. The most common failure is that the Mode Shifter coil burns out, reads open on a continuity test. Disconnect the red/yellow wire harness and use your meter on Rx1K and check continuity. If it’s open, replace the Mode Shifter assembly.

Here’s what the Mode Shifter looks like, click the image to purchase:
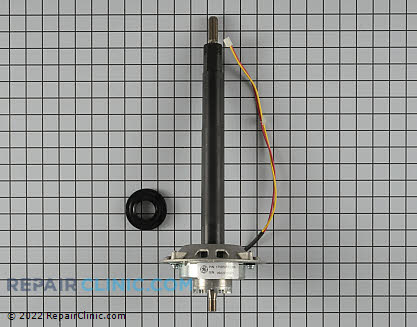
Mode Shifter
(Click image)

Return policy on all parts purchased through this website is 365-days. Even on electrical parts already installed.

To learn more about your washing machine, or to order parts, click here.

How to replace the drum rollers in a good ol’ Maytag dryer

mark wrote:

looking for instructions on replacing rollers on an older Maytag dryer model LDG7304AAE

Piece of pie, tovarish! First, come git you a pair of drum rollers.

Drum Roller
(Click image)

Even though it’s usually the roller above the heating element or flame tube that usually goes out first, it’s always a good idea to replace both as long as you’re going through the trouble of tearing down the dryer to fix it.

Speaking of tearing down and fixing, this nifty repair video shows you how to replace the drum rollers in this venerable dryer:

If you run into anything weird, come start a new topic in the laundry forum at the Samurai School of Appliantology and we’ll get you going.

To learn more about your dryer, or to order parts, click here.

Burning smell in a new refrigerator: is this normal?

Baldemar wrote:

Hi Samurai,

Three days ago, my 4 month old Frigidaire side-by-side started emitting a strange smell. A bit like a melting candle, with a strong plastic smell mixed in. Investigation found the odor strongest in the freezer department. It’s strong enough to easily ruin the ice in the ice maker, but it has not affected food items. Odor is still there today. Other than this, the fridge continues to function completely as normal.

Repairman was out today and claimed that he had the exact complaint on another similarly-aged Frigidaire yesterday. Complete teardown of that unit revealed no sources of the odor. He claims a call to Electrolux lead to advise that this is normal, and relates somehow to the fridge’s defrost cycles. Their only remedy is that I need to buy and use some type of wipes to clean everything inside to remove the smell, every time it occurs.

How does this sound to you? Have you run across anything similar in your appliance repair adventures?

Any info you can provide is appreciated.
bg

Not heard of this but then this is a fairly new fridge. I’m thinking the odor is related to the defrost cycle because of the heater used then. The manufacturer may have used a different formulation of foam in the cabinet insulation that has the unintended consequence of off-gassing from the heat of the defrost heater, causing the odor. These vapors can contain carcinogens like formaldehydes and other noxious products called volatile organic compounds (VOCs).

I would call Electrolux and insist that they either correct the problem or replace the refrigerator. Living with exposure to these VOCs and even having stinky ice is simply unacceptable in a new refrigerator and is not an option. I actually would be very surprised if Electrolux takes this position; I think it’s more likely that the servicer was “ad libbing.” But let me know what they say and I’ll do an update to this post.

To learn more about your refrigerator, or to order parts, click here.

Samurai Appliance Repair Man – http://fixitnow.com
The Samurai School of Appliantology – http://appliantology.org
Find and Buy Appliance Parts – http://parts.fixitnow.com

– Posted using BlogPress from my iPad

How to fix a dishwasher that won’t fill with water

mike wrote:

dishwasher doesn`t seam to fill with water

Click below to hear my enlightening and informative reply:

Water inlet valves for all brands and models of dishwashers right here. All parts purchased through this site come with a one year warranty and you can return ’em for a refund if it doesn’t fix your problem. 8)

And here’s a cool how-to video that helps you install the new valve:

To learn more about your dishwasher, or to order parts, click here.

Samurai Appliance Repair Man – http://fixitnow.com

The Samurai School of Appliantology – http://appliantology.org

Find and Buy Appliance Parts – http://parts.fixitnow.com

How to access the impeller to clean it out or to install the impeller and motor shaft seal kit in an older-model Whirlpool-built Power Clean™ dishwasher

If your good ol’ Whirlpool-built Power Clean Filter Module (that’s what they call it) dishwasher is making weird noises, you may have something stuck down in the impeller. This how-to video shows you how to get down to it.

If you find the impeller boogared up, or the dishwasher doesn’t seem to have the oompf any more or it’s leaking, you’ll need to replace the impeller and shaft seal kit, which you can get right here.

Impeller and Seal Kit
(click image)

Samurai Appliance Repair Man – http://fixitnow.com

The Samurai School of Appliantology – http://appliantology.org

Find and Buy Appliance Parts – http://parts.fixitnow.com

Common error codes / fault codes for major appliance brands of all types

Fault Codes – Table of Contents

Range/Stove/Oven Fault Codes
Dual Convection Wall Oven
“Big Oven” 5.1 cubic ft. (Sigma Touchmatic ERC)
Dishwasher
Dryer
Washing Machine
Range/Stove/Oven Fault Codes
RST376 Gas Range Fault Codes
Range/Stove/Oven Fault Codes
Range/Stove/Oven Fault Codes Version 1
Range/Stove/Oven Fault Codes Version 2
Range/Stove/Oven Fault Codes Version 3
Range/Stove/Oven Fault Codes Version 4
Gas or Built In Oven Fault Codes
XL44 Self Clean Oven Fault Codes
“New ’99” Range/Stove/Oven Fault Codes
Range/Stove/Oven Fault Codes
WSL Model Washing Machine
Microwave Fault Codes
Dishwasher Fault Codes – From Late 1990’s forward
Range/Stove/Oven Fault Codes
Newer Style Range/Stove/Oven Fault Codes
Range/Stove/Oven Fault Codes
Gemini Range/Stove/Oven Fault Codes
Type “C” and “D” Clocks Range/Stove/Oven Fault Codes
Range/Stove/Oven Fault Codes
Stackable A/W and Dryer Fault Codes
Range/Stove/Oven Fault Codes
Range/Stove Oven – Alternative 2 Digit Fault Codes
Range/Stove Oven BES, BEP models
Range/Stove 24″ Built-In Self-Clean Wall Oven
Range/Stove/Oven Manufacturers
Range/Stove/Oven Fault Codes
Range/Stove/Oven Fault Codes starting with an E
Range/Stove/Oven Fault Codes starting with an F
Range/Stove/Oven Fault Codes
Whirlpool Polara
Range/Stove/Oven Fault Codes Non Y-Line
Range/Stove/Oven Fault Codes, Common
Range/Stove Oven 30″ Free-standing, Models SF3 & 24″ Built-In
Whirlpool Duet & Duet HT
Calypso Washing Machine
Calypso Matching Dryer

How to test the ice maker and optics sytem in a Whirlpool / Kitchenaid Optical-Controlled In-Door Ice (IDI) system

First, some pearls of wisdom from Sublime Master Kurtiusinterupptus in the Samurai School of Appliantology:

1. Remove receiver board (right side) and insert wire into plug in black/black-white wire locations . This effectively bypasses the optics for test purposes. if you have no black/blk-white wires in the plug don’t panic, just chose the two wires beside the blank hole, not on the end.

2. test for voltage at the 4 wire harness plug, black to white and black to green…should have 120vac in both places. if not, inline fuse is open or wire is broken or separated in the liner. very bad and prolly not repairable (the broken wire not the fuse).

3. if voltage is present, hookup i/m and test at the points on the motor module head previously noted L and N…should have 120vac.

4. if voltage is present, install jumper between test points T and H…this should start the icemaker on a rotation if all the above outlined conditions are true. if it doesn’t, the motor on the module is bad. if it does start, reinstall i/m and wait till it fills and parks. remove jumpers and reinstall optics receiver. icemaker should work…if not, we have proven the icemaker assembly is good and the optics must be at fault, regardless of whether the light flashes are checking good or not.

And this enhancement from Grand Master appl.tech.29501:

The optics jumper wire cam remain until the cycle has completed.

The T & H jumper must be removed from the module once the cycle has started
if you listen closely at the beginning of the cycle you will hear the contacts in the module
“click” at about the 10 sec. mark its ok to remove the jumper at this point. I usually just
count to 12 and pull it out and the module should continue the harvest.

If you do not remove the T & H jumper and the cycle completes it will either blow
the new harness fuse or the module….

Manually Starting the Harvest Cycle in the Whirlpool-Built Modular Icemaker
(click for larger view)

Also, see this illustrative wiring diagram… http://appliantology.org/gallery/image/55-manually-jumpering-the-optics-board-in-a-whirlpool-idi-system/

http://fixitnow.com/wp-content/uploads/2012/06/58403958-Whirlpool-Optical-Ice-Maker-Revised-Diagnostics.pdf

To learn more about your ice maker, or to order parts, click here.

How to fix a GE top-loading washer that agitates but won’t drain or spin

cindy wrote:

I have ge top load washer Model Number: wpsr3120w0ww It agitates on all cycles but does not drain or spin. What could the problem be? Thanks for you help.

This will either be a clogged or bad drain pump. Remove the front panel as illustrated below:

Removing the Front Panel on a GE Top-Loading Washer
Uploaded with Skitch!

The pump is right there in front with the drain and and suction hoses attached to it. If there’s water in the drum, bail it out before removing the hoses or you’ll have that water all over your floor. Then remove the hoses from the pump and look for gookus inside the pump and the hoses. If found, clear it and try it again. If still no joy, replace the pump. Click the image below to get it. All good. 8)

Drain Pump and Motor - Part #908512
(click image to purchase)

To learn more about your washing machine, or to order parts, click here.

How to fix a dryer that won’t stay hot during the cycle or doesn’t get hot enough

Peter wrote:

We have a GE dryer model DDG7280SBLWW, S/N GL315788G. The problem is the dryer does not stay hot though the entire cycle for any of the cyles (automatic of timed). When the dryer is turned on for any cycle it initially gets hot and comes up to temperatur, vent pipe hot to touch but not burning hot, then the heat cycles off and does not heat back up. The dryer will run though the rest of the cycle and when it turns off the clotes are cold and damp. I removed the vent cap outside the house and cleanned the vent pipe and dryer to make sure we have sufficient air flow but no change in the dryer performance. We called a tech who came in and started replacing parts (i believe all the sensers, coils on the gas valve, timer & timer knob) but we still have the problem. They have sent differnet people to the house but it has been 2 weeks and the dryer still isn’t working. Wife near point of leaving. There is good and bad in all situations. Please help.

This is a classic symptom of a vent duct with too much backpressure. Vents can be clear of lint and still have excessive backpressure. You can easily test this by disconnecting the vent from the back of the dryer and run it again while observing the burner on/off cycle. I’m sure you’ll see normal heating operation.

Get the gory details on how to make a good dryer vent in this post:

http://fixitnow.com/wp/2003/10/15/appliance-tip-of-the-day-the-ultimate-dryer-venting-guide/

If you need more help, come see us in the Samurai School of Appliantology and start a new topic in the Laundry Forum: http://appliantology.org

Samurai Appliance Repair Man
http://fixitnow.com

The Samurai School of Appliantology
http://appliantology.org

Find and Buy Appliance Parts
http://parts.fixitnow.com

– Posted using BlogPress from my iPad