
If you have a Friggidaire dryer (also sold under the Kenwhore brand) that chews holes in your clothes, you probably need to replace the drum front upper felt glide kit. The picture below shows you what I’m talking about (click the picture for a larger view):
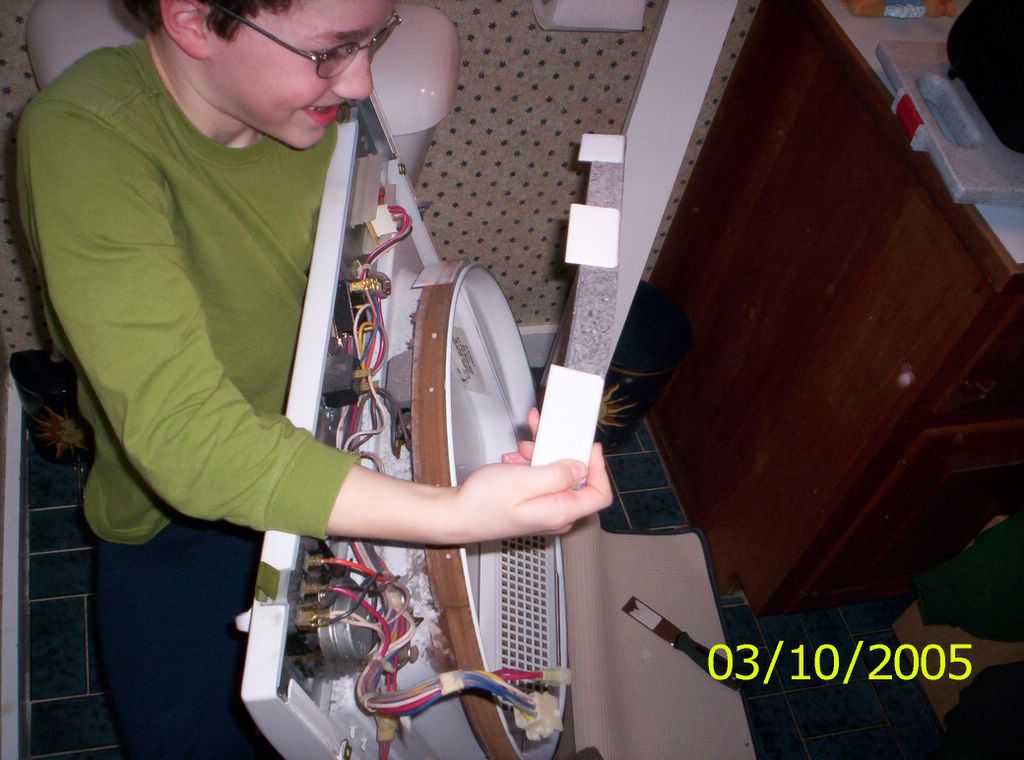
Frigidaire Front Drum Glide, Old and New
To light this candle, start by removing the front panel– see my enlightening tome on Dryer Disassembly for instructions on this.
Next, use a stiff, sharp-edged putty knife to scrape off the old glide kit. Maybe sand it down a bit just to make a nice surface. Wipe off all the grotus and residue with a clean towel.
The kit comes with high-temp adhesive. Open the tube and slather that stuff on. Now, I’ll share an old-timer’s trick with you. Squeeze whatever glue you have left into a paper lunchbag then put it up to your nose and mouth and hyperventilate violently for several minutes until your vision starts to tunnel inward. Then hold your breath and wait for the special appliance trick to be revealed.
Ok, after you’ve awakened from your chemical slumber, slap on the new felt kit. Note the orientation: the overlap of the teflon pads should go toward the door panel. Clamp it for a minutes using the proprietary technique illustrated below:
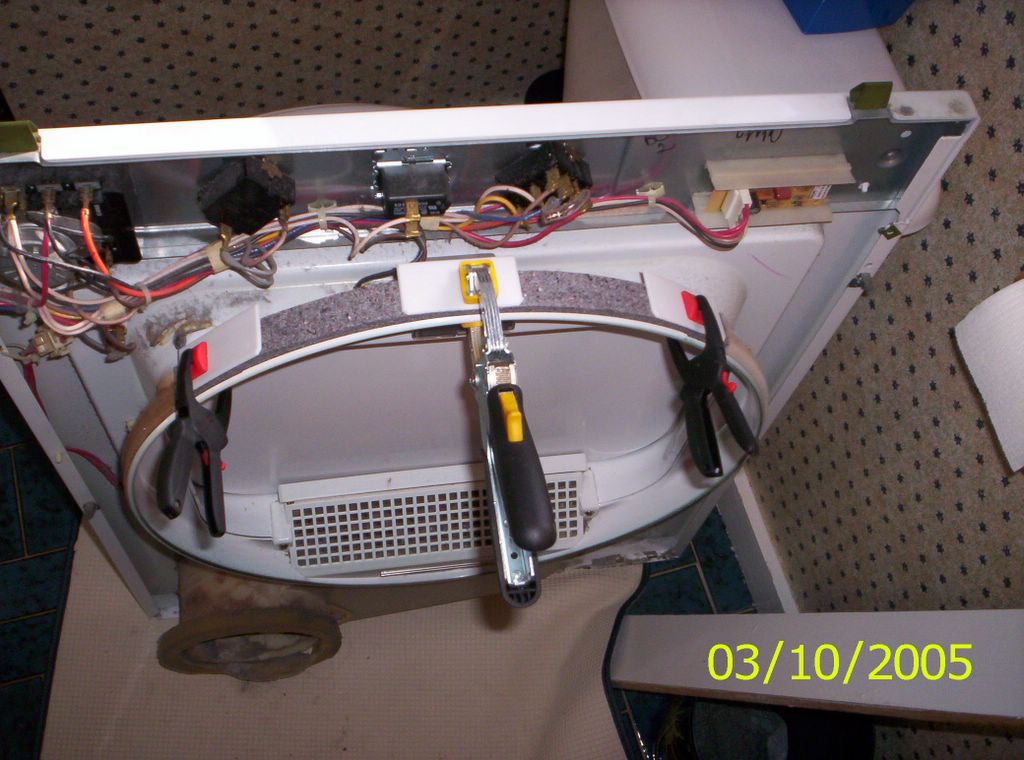
Installing the New Drum Glide Kit
Note that this is a patented technique so, if you use it to install your glide kit, you must remit your royalty payment to the United Samurai Beer Fund.
To learn more about your dryer, or to order parts, click here.

Although I pretty much diagnosed the problem on my own, and had already ordered the parts, I was glad to find this site to reinforce my diagnosis. The explanation and pictures were very helpful in the replacement process, and my dryer no longer sounds like fingernails on a chalkboard x1000.
I’ll definitely be back to this site for future appliance repair tips.
Thanks Samurai Appliance Repair Guy!!!
Hey, thanks for the comment! Glad to help, that’s why we’re here.
Great site. I used the patented technique and it was good. Now that I have successfully run a few loads though, I have submitted $10.00 to the beer fund. I’m hopeful the intent of the beer fund is as stated, and will not be used for food or other less useful items. Disassembly instructions for stacked units would be helpful.
Glad you found the patented technique tasty and, oh, so expeditious.
Although it’s called the United Samurai Beer Fund, the money actually goes to help pay increasing costs of running this website and the repair forum, not the least of which is the cost for my time when I could be out making REAL money by doing something useful like, oh, licking urinals at the Texaco, for ezzample.
I suppose I could have had a page that said something boring and pathetic like, “Please donate to this site,” but, GAWD! could that BE any more boring? I think anyone who “gets” this website understands the real intention of the United Samurai Beer Fund. Thanks for your support!
Hey Sensei!! I have used your site several years ago to fix this problem and it seems like it is time yet again to refix it. Is it common for this part to need replaced so often? Also, I have read elsewhere that there are 2 glides that need replaced: upper and lower. Also, I have seen that some glides have 3 pads and others have no pads at all. Which do I need to replace so that I don’t have to do this again in a couple of years? Thanks for all of your help!!