So you stuff a load of stinky skivvies in your Maytag Neptune washer, get it going and head over to your computer so you can check out the latest cool videos on the Samurai’s YouTube channel. You watch the videos– you laugh, you cry, they become a part of you and they’ve given your life new purpose and meaning that you never even dreamed was possible. Your newfound special purpose informs you to go check on the skivvies in the washer.
You find the washer full of water, stopped in mid-cycle and flashing some kind of weird code, like French, or something. Suddenly, you become aware of another pair of skivvies that needs to go in the washer.
First thing to do is stop and congratulate yourself for coming to the right website. Next, unclench them glutes and swallow that bile burning the back of your throat’cuz ol’ Samurai’s gonna hepya whup up on that ornery washer. Here’s the scoop:
El Problemo:
Current models will stop and flash the error code, “LR” in the display. If you have a model with an LCD display, it’ll show the error message, “Locked Rotor.” Older models won’t show a code, they’ll just stop mid-cycle or won’t re-start.
Model Numbers Affected:
MAH14PDAAL, MAH14PDAAQ, MAH14PDAAW, MAH14PDABL, MAH14PDABW, MAH14PDAEW, MAH14PDAGW, MAH14PDBAW, MAH14PDBEW, MAH14PDBGW, MAH14PDCBQ, MAH14PDCBW, MAH14PDDWW, MAH14PDSAW, MAH14PNAEW, MAH14PNAGW, MAH14PNAWW, MAH14PNBAW, MAH14PNBEW, MAH14PNBGW, MAH14PNSAW, MAH14PRAWW, MAH14PSAAW, MAH14PSAGW, MAH20PDA3W, MAH20PDAWQ, MAH20PDAWW, MAH20PDCXQ, MAH20PDCXW, MAH20PNAWW, MAH20PRAWW, MAH20PRDWW, MAH20PSAWW, MAH21PDA3W, MAH21PDAGW, MAH21PDAWQ, MAH21PDAWW, MAH21PDCXQ, MAH21PDCXW, MAH21PDD3W, MAH21PDDGW, MAH21PDDWQ, MAH21PDDWW, MAH21PDDXW, MAH21PNAGW, MAH21PNAWW, MAH21PNDGW, MAH21PNDWW, MAH21PRAWQ, MAH21PRAWW, MAH21PSAWW, MAH3000AAW, MAH3000AEW, MAH3000AGW, MAH3000AKW, MAH3000AWA, MAH3000AWQ, MAH3000AWW, MAH3000BGW, MAH4000AWQ, MAH4000AWW, MAH4000BWQ, MAH4000BWW, MAH5500AWW, MAH5500BWQ, MAH5500BWW, MAH55FLBWQ, MAH55FLBWW, MAH6500AWQ, MAH6500AWW, MAH7500AWQ, MAH7500AWW, MAH7550AAW, MAH7550AGW, MLE19PDAGW, MLE19PDAYW, MLE19PDAZW, MLE19PDCZQ, MLE19PDCZW, MLE19PNAUW, MLE19PNAYW, MLE19PRAYW, MLE19PRAZW, MLE2000AYW, MLE2000AZW, MLG19PDAEW, MLG19PDAGW, MLG19PDAWW, MLG19PDAXW, MLG19PDBGW, MLG19PDCXQ, MLG19PDCXW, MLG19PDSAW, MLG19PNAWW, MLG19PRAWW, MLG19PRAXW, MLG2000AWW, MLG2000AXW, MLG23MNAWW
What’s Going On?
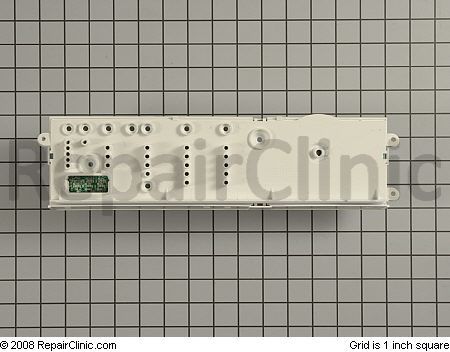
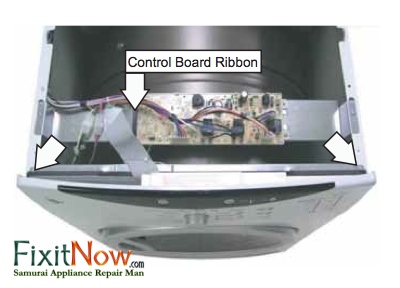
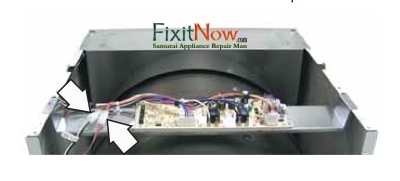
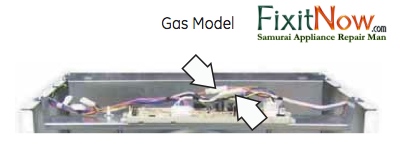
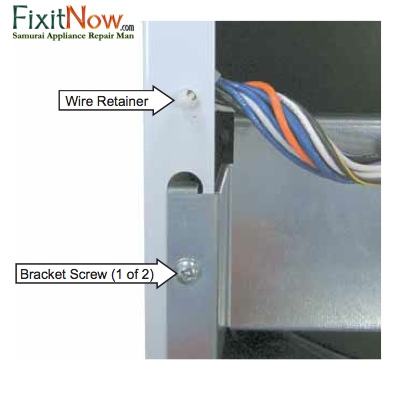
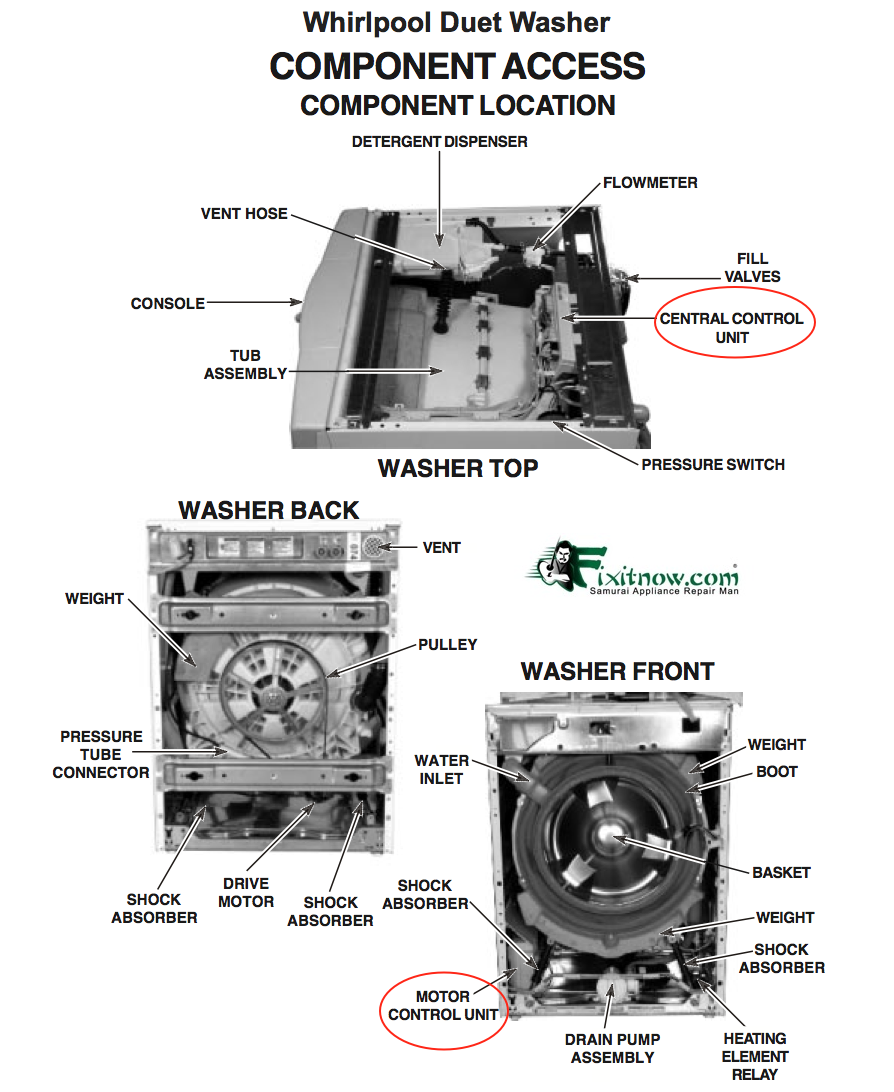
There’s a bad connection in the neutral wire (the white one) that runs from the power cord to the Motor Control Board. This neutral wire is routed across the water inlet solenoid valve via a terminal connection on its way to the Motor Control Board where it ends in another terminal connection. The problem is basically a crappy crimping job anywhere along this neutral wire’s path from the power cord, through the water inlet valves, and finally ending at the Motor Control Board.
Whaddya Gotta Do?
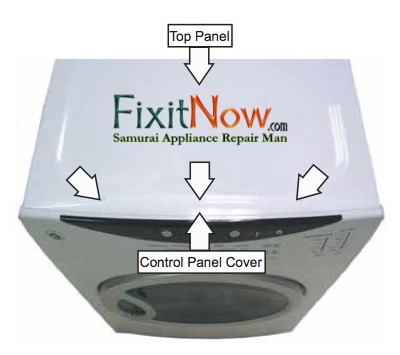
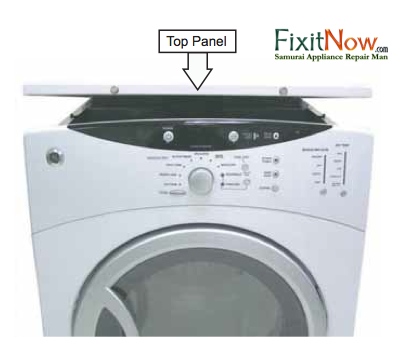
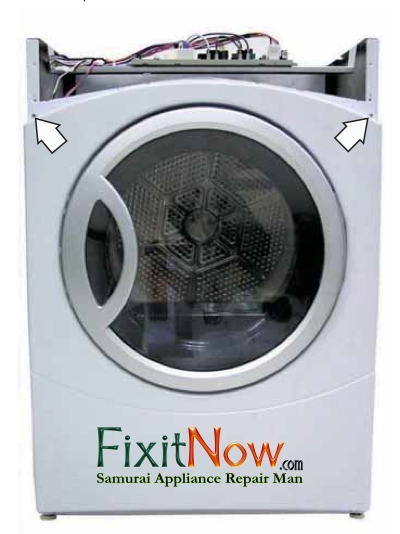
Start at the point where the power cord wire enters the washer and locate the neutral (white) wire. Follow it throughout the machine– this is the fine art of wire chasing. Tug on each terminal of the white wire wherever it’s connected at a terminal or wire harness, such as the water valve solenoid, and make sure that the wire is in there goodntight. If it comes out in your hand when you tug on it then– ding-ding-ding!– we have a winner. You’ll need to apply some wire-working skills and get that wire securely re-connected. That’s beyond the scope of this article but we can hepya with that in the Samurai Appliance Repair Forums.
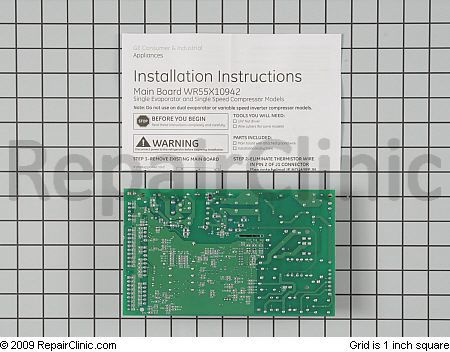
Maytag has since changed this wire so that it by-passes the water solenoid valves and goes across the pump only, reducing the number of connections.
To learn more about your washing machine, or to order parts,
click here.


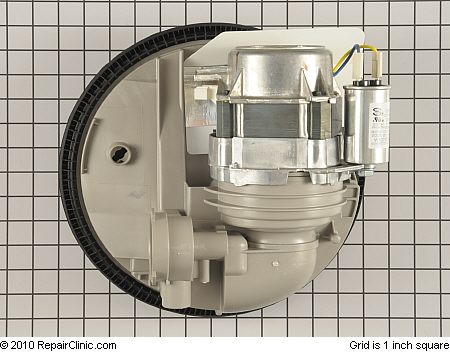
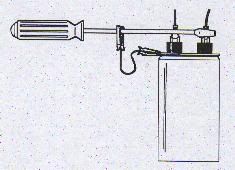 After you get the control panel open, there’s just one other safety thing to do before you start sticking your paws all in there: discharge the high voltage capacitor. The HV capacitor can hold up to 2,000 volts which can really curl your hair. Don’t start freaking out on me, all’s you gotta do is short the terminals together like ahso. It the capacitor is holding charge, it can snap like a fire cracker and make a cool-looking flash-bang so… heads up!


 Well, they done went and did it this time– them engineers at Maytag made a boo-boo that can make your dishwasher spontaneously burst into flames, engulfing your entire house and all your loved ones in a giant, hairy ball o’ flame!