Category Archives: Washer Repair

Whirlpool-Kenmore Top-Loading Washer Just Fills to Overflowing When Started– No Agitate, No Spin

Shellee wrote:

Alright, I fixed the thing and I’m not sure if this is even related to the other stuff.

So, yesterday our Washer was working fine. Today, it’s not.

I went to go wash a batch of clothes, turned the water on and it kept running, and running. It was going to overflow. It never switched over to agitate the clothes. I turned it to the spin and drained all of the water.

Yesterday while I was putting the washer back together, my 3 year old came out and pulled out the clear tube that runs from the top console (already detached from console) and pulled it completely off the machine, filled it with water and went running around whapping things with it. Could this be what the problem is?

I still don’t want to have to use the anniversary money! Let me know

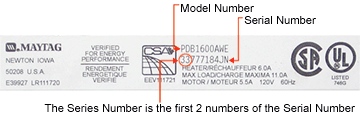
Washer is a Whirlpool Model # LSR8444LQ0

Thanks again!!!

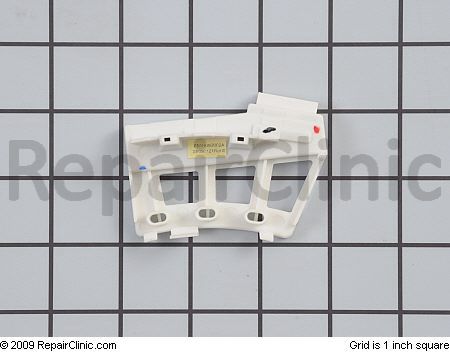
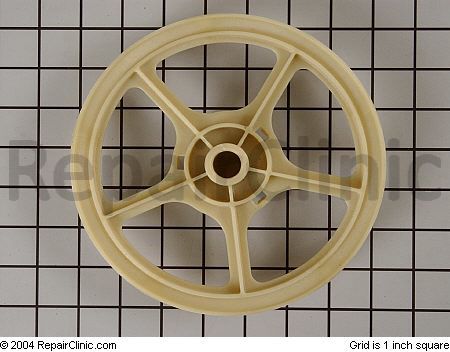
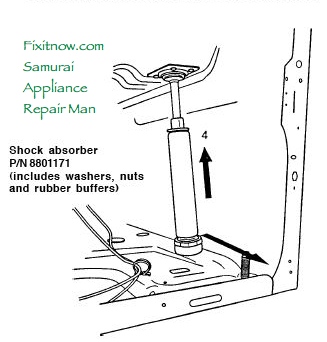
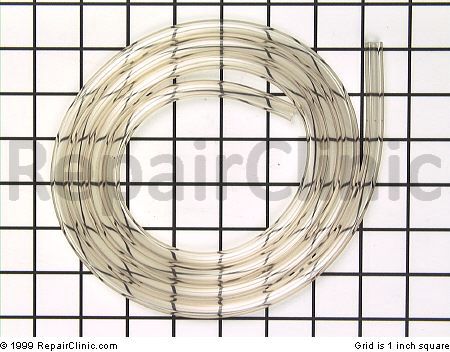
Sounds like your toddler snagged the air pressure tube out of your washer. Kids can be devious thata way! A missing, disconnected or plugged-up air pressure tube will cause ezzacly the problem you’re seeing with your washer. Here’s a picture of the air pressure tube and, in case junior managed to destroy it, you can click it to buy a new one:


Air pressure tube for a Whirlpool-Kenmore top-loading washing machine-- click it to git it, Hoss.


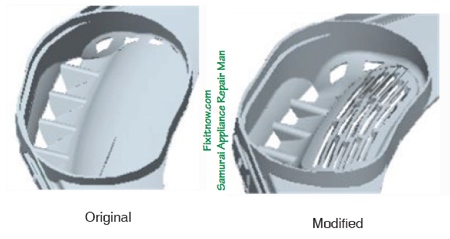
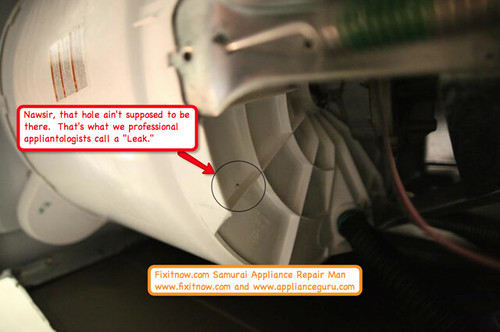
The air pressure tube is connected to the pressure switch at one end and the tub’s air pressure dome at the other. The photo below shows how it’s supposed to be connected and routed:


Whirlpool Direct Drive Washer Guts


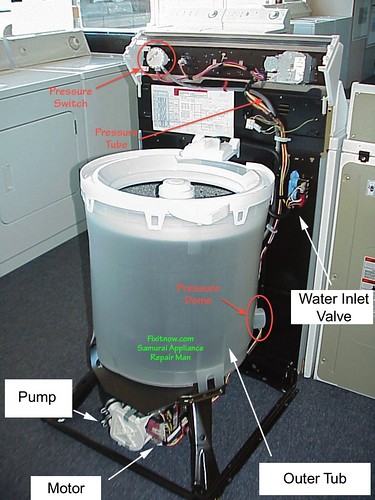
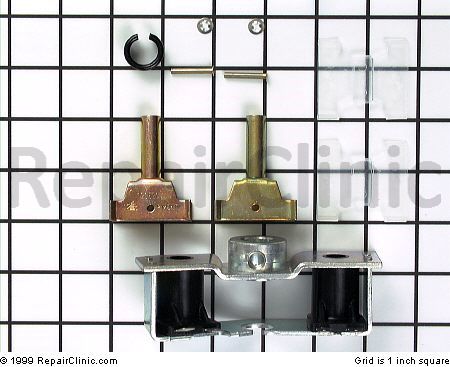
The way it’s supposed to work is that the pressure in the tube increases as the water level in the tub rises. The pressure switch senses this change in pressure, cuts off voltage to the water inlet valve– thus stopping the flow of water into the washer tub– and then switches power over to the motor so the washer starts agitating. Well, this ain’t gonna happen if the air pressure tube is missing, disconnected at one end or plugged up with gookus (which sometimes happens at the end that’s connected to the tub’s air pressure dome). The pressure switch looks like this…


pressure switch or water level sensing switch in a Whirlpool-Kenmore top-loading washing machine-- click it to git it, Hoss.


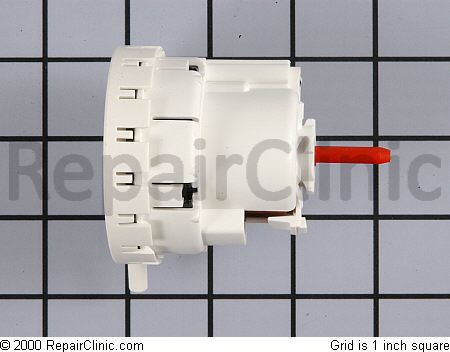
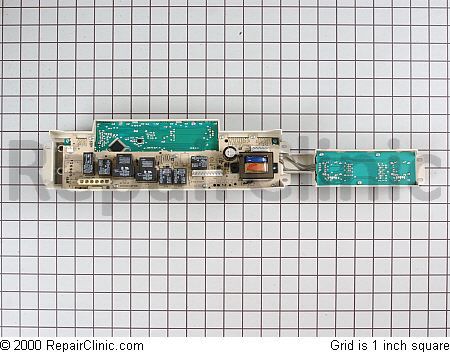
… and is located in the control console; it’s item 12 in this diagram.

A bad pressure switch can also cause the problem you’re seeing and is actually fairly common (though I don’t think this is what’s going on with your washer based on your description); in which case, you’d just replace the pressure switch.

Awwite, go fix your washer and keep that kid locked up while you’re doing it!


To learn more about your washing machine, or to order parts, click here.

Whirlpool Cabrio and Maytag Bravo Washers: Intermittent Leak from the Front Left Corner


Cabrio, Bravo:
sometimes leak, front left corner.
Install new tub ring.
the bamboo knows all, grasshoppah


Cabrio Washer Tub Ring Modification.jpg

Part Links for New Tub Rings:

Affected Model Numbers:

(Word: The Whirlpool Cabrio®, Maytag Bravo®, and Kenmore Oasis® washers are the same machines.)

To learn more about your washing machine, or to order parts, click here.

Whirlpool Duet Washer F02 Error Code. Problem Solved!

Michael wrote:

I read a few lines of your forum and was able to repair my Whirlpool Duet washer. F02 error root cause : color catcher fabric sheets caught in filter. They were powerfuly stinky! Total investment in repair… 25 minutes. Thank you master of appliantology.

Nice work, my fine, young apprentice! I also have a post on this very problem ratcheer on this site: behold!

And now, may the golden, pot-bellied, bald-headed, breasticled Buddha grin down upon your pate and inspire you in your future appliance repair crusades.

The golden, pot-bellied, bald-headed, breasticled Buddha who watches over all who engage broken appliances in mortal combat.

Can I hear an, “Amen?”


To learn more about your washing machine, or to order parts, click here.

Washing Machine Drain Pipe Backs Up and Overflows When Washer Pumps Out

Dick Slade wrote:

Kenmore washer, Model 110.92582220. The drain pipe in my house is only 1-1/2″. Water backs up. The water backs up from our drain pipe and out of drain where the flexible J-shaped hose from the washing machine connects to the drain. I have had our drain pipes ‘snaked’ or ‘rooted’ so I know there is no blockage. I have been told that the water comes out of the washer so fast that this size drain-pipe simply can’t handle it. Is there any way that I can reduce the rate at which the water is pumped OUT of the washer – by adjusting the pump, or restricting the size of the opening where it drains? One local plumbing company said that they have had some success in similar situations by clamping a 3/4″ nipple on the end of the hose that empties into the 1-1/2″ drain. Can this be done safely without causing a leak somewhere else in the washer, or worse yet, damaging the washer? Any other thoughts (besides re-piping my house)? Thanks

Well, well, well, sounds like you got yerself a bonafide case of them ol’ Washing Machine Drain Pipe Backin’ Up Blues.

To learn more about your washing machine, or to order parts, click here.

Clothes Wrapping Around the Agitator in a Whirlpool or Kenmore Top-Loading Washer with Dual Action Agitator

Rob Thibs wrote:

I have a 11082874820 kenmore washer. The upper part of the aggitors spins freely when washer is off, but wont agitate (spin) when bottom spins. How do I get this apart and what may be the problem?

 Kenmore-Whirlpool Washer Dual Action Agitator

Agimutator:
bottom part moves, top does not.
Who let the dawgs out?

the bamboo knows all, grasshoppah

To learn more about your washing machine, or to order parts, click here.

Troubleshooting Whirlpool and Maytag Front Load Washers That Will Not Start

Affected Model Numbers:

Serial Numbers: All

The Problem: The washer may be beeping three times, showing a F70 or F71 error code, and not starting.

Cause: The comoonications between the electronic components is screwed up.

Correction: Use the diagnostic charts below to diagnose F70, F71 and “not starting” complaints.

Whirltag FL Washer F70 Error Code
Whirltag FL Washer F71 Error Code

To learn more about your washing machine, or to order parts, click here.

Washing Machine Plastic Outer Tub Sprang a Leak!

Jason wrote:

My clothes washer has begun leaking water. It’s a combo washer/dryer. It’s model number FEX831FS0 by Fridgidaire. I’ve taken it apart and noticed where the water was leaking from but am too unfamiliar with how clothes washers work to know why it’s leaking from this particular spot.

I would really appreciate any sort of assistance you can provide. Thanks!

This is the hole it’s coming from which unless I’m mistaken is the tub. Could it be the seal has broken as this hole looks like it’s supposed to be there?

Thanks very much!!

Domo for sending along a photo of what you’re seeing. I’ve marked it up and included it below:

Washing Machine Tub Hole

As you surmised, that’s a hole in the washing machine plastic outer tub. It ain’t supposed to be there. Slap a dab of J-B Weld epoxy putty on there. Fix ya right up!

To learn more about your washing machine, or to order parts, click here.

The Samurai’s 12-Step Program for Replacing the Shock Absorbers in an Asko W600 Washing Machine

Asko W600 Washer Shock Absorber Replacment.jpg

1. Buy the replacement shock absorber kit here.

2. Front Shock Absorbers: Remove the front panel or lower cover panel. Rear Shock Absorbers: Remove the rear panel (12, #20 torx screws around the rear panel).

3. Remove the shock absorber nuts under the rear plate.

4. Support the holder from underneath or secure it with a hook from above.

5. Compress the shock absorber. Angle it outwards and pull it off downwards.

6. Take off the piston rods.

7. Remove the rubber buffers.

8. Install new rubber buffers (included with the new shock absorber kit).

9. Compress the shock absorber and put it into position in the bottom plate.

10. Fit the nut on the underside and tighten it.

11. Front Shock Absorbers: Replace the front panel or the lower corner. Rear Shock Absorbers: Replace the rear panel.

12. Pop a cold one and buy me one while you’re at it. Domo!

To learn more about your washing machine, or to order parts, click here.

Locating the Series Number on Maytag Appliances

Lots of times, when you’re working on Maytag appliances, you need to know the series number to order the correct part. Not to be confoosed with the model number, the series number refers to different production series within the same model. In the world of manufacturing, it’s common to substitute originally-specified components with upgraded or re-designed ones based on failure reports from the field. Since these component changes may affect other components in the machine, which may have been modified, you need a way to keep track of what component goes with which production run. In the Maytag world, this is done via “series numbers.” Series numbers are simply the first two digits of the serial number, located on the model number tag, like ahso:

ZZ7C73FA40.jpg

If you’re having trouble locating the model number tag on your appliance, come feast your bloodshot squinties on these diagrams.