True song randomizing in iPods: finally, a cause worth fighting for! http://post.ly/xDEW
True song randomizing in iPods…
Leave a reply

True song randomizing in iPods: finally, a cause worth fighting for! http://post.ly/xDEW
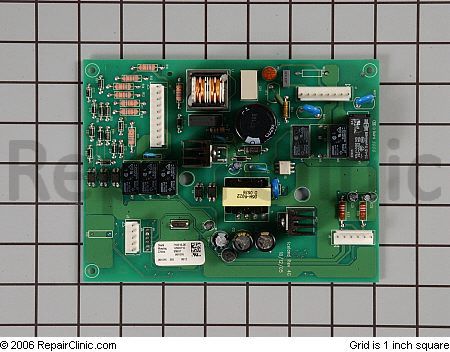
GE Harmony washer WPGT9360 makes loud clicking noise while agitating intermittently. What’s a brutha to do? Do dis: http://ow.ly/2D8oG
All right, time for another of my highly requested recipes. This is great to make for a crowd, because if you have it sitting around for very long in your house you’ll eat so much that you’ll have to run a marathon to burn off the extra calories. Like the Corn Casserole, it’s very easy to make, and if anyone tries to discuss the nutritional makeup of it, plug yours ears and hum.
Graham Cracker Toffee
2 packs of plain graham crackers (approx.)
2 sticks unsalted butter
1/2 cup sugar
1/4 cup brown sugar
1/2 tsp. salt
12 oz. bag chocolate chips
1 cup. chopped pecans (roasted for a few minutes in the oven, if there is time, to bring out the flavor)
optional – mini marshmallows
Preheat oven to 375 deg. F. Line a large, rimmed baking sheet (mine is about 17 in. x 12 in.) with foil, tucking into the corners and allowing some to wrap around the sides. This takes the wide roll of foil – if you have only a regular roll of foil, use 2 smaller pans. You do not want this stuff to get on the pan itself – it’s like superglue. Grease foil with unsalted butter or cooking spray.
Arrange the graham crackers in the pan in a single layer, breaking them as needed to cover as much of the pan as possible.
Melt the butter, sugars, and salt in a saucepan, then bring to a boil over moderate heat, stirring frequently. As soon as it comes to a boil, carefully pour the mixture over the graham crackers, using a spatula to smooth it evenly. Make sure all of the crackers are covered. Bake for about 10 minutes – the syrup should be enthusiastically bubbling.
Immediately sprinkle chocolate chips all over the crackers, then put back in the oven for a minute or two. Remove pan, then smooth the chocolate out using the spatula. Sprinkle the nuts over the chocolate (and, for a “Rocky Road” variety – some mini marshmallows), then let it cool for 30 minutes. Stick the pan in the freezer for about half an hour to harden the chocolate, then lift the foil off the pan and break or cut the toffee into pieces. Enjoy!
Hot dayyam! A perfectly-baked corn casserole goin’ down tonight… http://post.ly/xBNT
Maytag Atlantis washer agitates & spins at the same time==>bad transmission. Crappiest washer ever made? http://j.mp/9cEdNM
Dacor ECD/ECS oven repair goodies: flow charts, fault codes, diagnostics, svc. bulletins and more: http://j.mp/aE6YRx
Follow me on Twitter to get all my Tweets as they happen:
http://twitter.com/FixitnowSamurai
If you’re having weird, poltergeist problems with the dispenser door or display on your Maytag or Amana “ICE-2-0” refrigerator, this post is for you!
Affected Models:
Maytag Models: MFI2568AEB MFI2568AEQ MFI2568AEW MFI2568AES MFI2067AEB MFI2067AEQ MFI2067AES MFI2067AEW
Amana Models: AFI2568AEB AFI2568AEQ AFI2568AES AFI2568AEW
The Fix:
Replace the high voltage control board kit.
(click it to git it)
The kit includes: control board, installation and programming instructions, return label and card for the old part.
Suspecting your microwave oven of slacking off on the job? Here’s a quick and easy test that’ll let you check your microwave oven’s heating output without needing to buy fancy equipment; only things you’ll need are a 1 liter PYREX glass bowl and a thermometer that can measure the temperature of hot water.
IMPORTANT: Make sure the bowl you are using is PYREX glass or another brand of glass that explicitly states it is microwave safe. DO NOT use plastic (inaccurate) or metal (DUH!).
MICROWAVE PERFORMANCE TEST
1. Fill the PYREX bowl with water at room temperature. Record initial water temperature.
2. Run the microwave on high power for 2:03. Not 2:04, nor 2:02 except ye go on to 2:03. 2:05 is right out.
3. Record end water temperature.
If the microwave magnetron is working right, the minimum difference between the initial and ending temperature should be about 86℉. If it’s much less than this, then you probably have a weak magnetron. If water temperature hardly changes at all, then there’s something wrong with the high voltage section and you’ll need to troubleshoot it. Suspects include: magnetron, HV transformer, HV capacitor, HV rectifier, and door interlock switch among others.
Samurai’s stash of refrigerator repair docs & manuals on Scribd, by invitation only. And you’re invited. http://ow.ly/2CMWu
LG Refrigerator LRSC26910 Error Codes http://post.ly/wxGS
Follow me on Twitter to get all my Tweets as they happen:
http://twitter.com/FixitnowSamurai
Sublime Master of Appliantology john63 explains this procedure in the Samurai Appliance Repair Forums:
On the LG refrigerator model LFC20740SW—the DOOR HANDLES are removed by either grasping the HANDLE and pulling in an upward motion—about an inch.
OR
I prefer to protect the bottom of the HANDLE with a piece of cardboard or rag and lightly tap the bottom with a small hammer. Once the DOOR HANDLE moves up about an inch or so—it can removed.
Using a 1/4 ” allen/hex key—tighten the two BOLTS that the DOOR HANDLE attaches onto.
If this fails to provide a snug fit–check:
1) That the DOOR HANDLES are re-installed properly—reverse of removal–but must be fully seated on the BOLTS on the door.
2) The INSERTS on the DOOR HANDLE is somehow damaged (not likely) and should be replaced. These are the metal pieces on the opposite side of the HANDLE which slips over & onto the door BOLTS.
The french door gaskets can *tear* if they lack lubrication.
Due to the fact that french door style refrigerators do not have a *center partition* like a side-by-side refrigerator—-the french door gaskets must seal **sideways**.
All french door refrigerator door gaskets should be checked for a slippery feel at this section of the gasket. Use FOOD GRADE SILICONE or VASELINE. Just a thin coating.
To replace the DOOR GASKETS—pull off the old gasket from the door until reaching the **sideways** section.
The plastic trim needs to be pulled off at this part of the door. Try to get your fingers into the leading rdge and pull until the plastic tabs “snap” and release.
Using a flat / slot screwdriver—-the two white locking tabs will need to forced out from their mounting holes. This is the most challenging part of removing the gasket.
If you get this far—let us know. There’s more to be aware of when installing the new gasket.
Here are the part links for the door gaskets:
Who made your Kenmore appliance? Use this magical Kenmore model number decoder to find out. http://flic.kr/p/8zYtZh
Relay failure melted down the terminals on this compressor. Many times, the terminals will become brittle and break off. Reconnecting the new relay becomes an artistic challenge at this point. Sometimes, there’s no choice but to replace the compressor for big bucks. This is always true if one of the compressor connection studs breaks off.

So what caused this? A cheesy electrical part, namely the relay, failed because, well, it’s a cheesy electrical part. An unsatisfying answer I know but, without getting into the engineering analysis of material failure, that’s the short answer. And don’t blame the engineers; feast your blood-shot squinties on the bean-counters and marketing geeks hovering over the engineers, hounding them about how the appliance needs to come in at $X in order to meet “corporate projections.”