Category Archives: Oven Repair

How to test the bake or broil element in an electric oven to see if it’s good or not

Everyday I get at least one email about an electric oven that won’t heat up. Many times, the person emailing me had already bought a replacement element hoping that was the problem because they didn’t know how to test their element to see whether or not it was bad in the first place.

This video shows you how to test the bake or broil element in your range so you’ll know whether you need to buy a new element or if the problem lies somewhere in the power supply circuit to the element.

BTW, the technique demonstrated below applies to anything where you’re trying to measure its resistance, whether it’s a heating element or a heat probe.

To learn more about your range/stove/oven, or to order parts, click here.

GE JTP18 convection oven door won’t open after clean cycle; DOOR error on control panel

Don wrote:

GE convection oven model # JTP18WOW1WW Oven has blinking light “door locked” Enter in any temp for oven and DOOR comes up on screeen

Thank you
Don

Issues:

1. Door will not open after self clean cycle due to motorized latch motor stuck in closed position or

2. Grinding noise during motorized lock operation.

Both issues are caused by interference of the inner vent trim slot with the latch arm as it travels to the closed position.

Correction:

Replace both the door lock motor assembly and inner vent trim.

To learn more about your range/stove/oven, or to order parts, click here.

How to fix your gas oven that doesn’t get hot enough and save $800!

Amanda wrote:

Hello,
Just wanted to thank you for the great advice on forums. My 5 year old viking oven wouldn’t heat beyond 250. Per your advice, I replaced the ignitors (following your great video/picture demo). Viking service quoted me $900 to fix! I spent $112 on the ignitors and did it myself with your help. Working great now! Thank you thank you thank you!

That’s what Fixitnow.com is all about: Fix it yourself and save Big Bucks!

Here’s the page that Amanda used to help her replace the ignitor ==> http://fixitnow.com/wp/2008/08/06/how-to-replace-the-ignitor-in-a-gas-oven-a-pictorial-guide/

And here’s a tip for saving even more $$ in this repair. All oven ignitors are made of the same material: carborundum. The real variable is the length of the ceramic insulator and the type of wire connections. Here’s another fun fact to know and tell: Viking ignitors suck. They basically take the Maytag universal ignitor kit rejects, slap a Viking label on it and jack the price up almost three times. Next time, cut out the middle man (Viking) and get the Maytag universal ignitor kit:

Maytag universal ignitor kit

I have successfully used this ignitor on many other brands of ranges including Viking and Garland. This ignitor is less than half the price and lasts far longer.

To learn more about your range/stove/oven, or to order parts, click here.

How to fix a gas oven that won’t fire up, won’t get hot, won’t keep temperature, or goes BOOM when/if it does fire up

Kevin wrote:

Hi, Our Kenmore stove oven has delayed ignition i.e. we turn it on and perhaps 2 or 3 minutes later there’s a loud boom as the gas ignites and a smell of gas. What should we do? Thank you Kevin


Abe wrote:


I have a tappan model 30-3989-23 stove. When I turn the oven on and set the temp I hear the top console click like normal and the display shows it as being on, but the oven does not heat up.


The burners and top broiler works fine. In fact if I turn on the oven after using the broiler the oven temp does show that it has gone up. But the temp slowly goes down as the oven still does not work.

Any help would be appreciated. Thank you.


tyestick wrote:


Type of Appliance: Oven/Range/Stove


Brand: maytag

Model Number: MGR5750AAW571

Your Precious Words: No gas to oven. haven’t metered the ignitor as yet. Is it likely both oven ignitor and broiler ignitor are bad or will it be just the oven ignitor. 2003 maytag

Click the play button below to hear my answer:


Hot Surface Glow Bar  Igniter - Part #3377
(click image to purchase)


To learn more about your range/stove/oven, or to order parts, click here.

Samurai Appliance Repair Man – http://fixitnow.com

The Samurai School of Appliantology – http://appliantology.org

Find and Buy Appliance Parts – http://parts.fixitnow.com

How to fix a gas stove burner having trouble firing up

George wrote:

Our sealed burner GE stove model no. JGBP30WEH2WW now about seven years old still is clicking, however, the burners only llght occasionally. The simmer burner on lights rarely. The burners were cleaned as per instructions from the GE manual. Using matches the burners light immediately. What are your suggestions? New spark ignitor switches, do I do the repair, and where can I order them from.

Click the play button below to hear my answer:

To learn more about your range/stove/oven, or to order parts, click here.

Samurai Appliance Repair Man – http://fixitnow.com

The Samurai School of Appliantology – http://appliantology.org

Find and Buy Appliance Parts – http://parts.fixitnow.com

Mailbag: How to fix a dim display on a Magic Chef range

benny wrote:

i have a magic chef oven model 5898vvv, approx 19 years old, the display in the clock is out out,cannot see the clock,or timer or oven settings,has benn out for quite a while,started working again the other day for a couple of hours then went out again,not sure if its the clock assembly,any hely would be appreciated

This is a bad ERC (electronic range control, a fancy word for “clock assembly”). Slam dunk. I have personally fought this battle many times.

The ERC is still available and you can buy it here.


(click it to git it)

The part comes with a one year guarantee. If it fails for any reason during that time return it for a refund or replacement. You can also return it for a refund if it doesn’t fix the problem! How ’bout them apples?

If you need help installing it, come start a new topic in the Kitchen Forum at the Samurai School of Appliantology.

How to test the touchpad on a #GE Profile #walloven

If you’re getting an error code on your GE wall oven and you’re not sure whether the bad actor is the touchpad or the electronic range control (ERC) board, use this cheat sheet to test the touchpad. If the touchpad checks out good, then replace the ERC. Ees seemple, da?

Ge Wall Oven Touchpad Ohm Test

To learn more about your range/stove/oven, or to order parts, click here.

Troubleshooting a Whirlpool DSI gas range: no bake, no broil, no spark; replaced DSI board, no change

I’ve posted several troubleshooting tips in the past on Whirlpool’s finicky and temperamental Direct Spark Ignition (DSI) gas range (see this page). This one is a special case no-ignition case where you’ve ruled out the other possible causes that I’ve posted about previously and even replaced the DSI spark board in a desperate but blind attempt to solve the problem. Wellll, you just grab o’ them squishy lumps below your spine and come romp with with the Samurai on another DSI range repair adventure!

First thing, check for 120vac coming out of the ERC (the electronic range control, aka “clock,” also called an oven control board) and into the new DSI board at the Bake J1-6 or Broil J1-7 harness connectors.

If you don’t have this voltage, then you need a new oven ERC (oven control board) ==> http://www.repairclinic.com/Model-SF378LEPS1-ID-655278-Circuit-Board-Or-Timer-Parts

If you have 120vac present, then you know the ERC is calling for heat properly. On to the gas valve…

Whirlpool DSI Gas Range GS563LXS - Bake and Broil Solenoid Activated Ports
(click to enlarge)

Both coils on the gas valve have to have continuity or it will not work. The DSI control checks this before it does a function. Also note that these coils are LOW VOLTAGE DC 8 to 18 VDC.

To test, remove the wires at the gas valve and ohm from the center terminal (Common) to the upper one (Broil); then from the center terminal (Common) to the lower one (Bake). If either one is open then you need a gas valve, get it here==> http://www.repairclinic.com/PartDetail/Gas-Valve-Assembly/1159151?modelNumber=GS563LXSQ0

Samurai Appliance Repair Man
http://fixitnow.com

Parts==> http://parts.fixitnow.com
Forums==> http://appliantology.org
Facebook==> http://facebook.com/fixitnowsamurai
Twitter==> http://twitter.com/fixitnowsamurai
Newsletter==> http://newsletter.fixitnow.com
SMS==> 603-505-8460

Amana Range Model ARR3601WW Schematic and Wiring Diagram

Amana Range Model ARR3601WW Schematic and Wiring Diagram

Model number variations: ARR3601

Amana Range Model ARR3601WW Schematic and Wiring Diagram
(click to enlarge)

Samurai Appliance Repair Man

Parts==> http://parts.fixitnow.com
Forums==> http://appliantology.org
Facebook==> http://facebook.fixitnow.com
Twitter==> http://twitter.fixitnow.com
Newsletter==> http://newsletter.fixitnow.com
SMS==> 603-505-8460

GE Range Model JBP21BC1CT Wiring Diagram

GE Range Model JBP21BC1CT Wiring Diagram

Model number variations: JBP21BC1, JBP21B

GE Range Model JBP21BC1CT Wiring Diagram
(click to enlarge)

Samurai Appliance Repair Man
http://fixitnow.com

Parts==> http://parts.fixitnow.com
Forums==> http://applianceguru.com
Facebook==> http://facebook.fixitnow.com
Twitter==> http://twitter.fixitnow.com
Newsletter==> http://newsletter.fixitnow.com
SMS==> 603-505-8460

How to remove the bake element in a Kitchenaid KEMC308KSSO electric range

Download these parts list and breakdown diagrams then open your Appliantology hymnal and sing along:

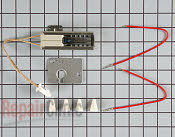
TO REMOVE THE HIDDEN BAKE ELEMENT:

a) Remove the right side panel (see below for the procedure).
b) Spread the insulation away from the front of the hidden bake element.
c) Disconnect the two wire connectors from the hidden bake element terminals.
d) Remove the element shield screw from the right end of the shield.
e) Pull the hidden bake element and its shield to the right and unhook the left and right tabs.
f) Remove the hidden bake element from the unit, and place it on a work surface.
g) Remove the two bracket screws, and remove the shield from the element.

REMOVING A SIDE PANEL

1. Unplug range or disconnect power.
2. Pull the range away from the wall so that you can access the rear of the unit.
3. Remove the oven door and set it aside (see below for the procedure).
4. Pull the storage drawer out as far as it will go.
5. Remove the two rear screws from the side panel
6. From the rear of the unit, reach inside and remove the screw from the bottom of the side panel.
7. Slide the side panel forward and unhook the front edge, then tilt the top of the side panel out,
and lift the panel from the unit.

NOTE: When reinstalling the side panel, set the bottom edge on the rail,
hook the front edge at the top and bottom, and install the two rear screws;
then install the bottom screw from inside the rear of the unit.

REMOVING THE OVEN DOOR

1. To remove the oven door, open the door to its first stop.
2. Grasp the sides of the door, lift it slightly, and pull the door forward
until the hinge hangers are partially out of the slots in the chassis.
Do not completely remove the hinge hangers from the slots,
since there will be spring tension on them.

3. Reposition the angle of the door to its vertical position to remove the spring tension
on the hinge hangers, then pull the hangers the rest of the way out of the chassis slots.

To reinstall the oven door:

1. Grasp the sides of the door and insert the hinge hangers into the hinge slots.
Lift the door slightly and push in at the bottom until the hangers are fully installed in the unit.

NOTE: If the hinge hangers are not seated properly, the door will not close tightly and may be off-center.
To seat the hinge hangers, keep the door vertical, then lift it slightly, and push in on the bottom
until the hangers are fully seated.

2. Open and close the oven door to make sure that it operates and seals properly.

Samurai Appliance Repair Man
http://fixitnow.com

Parts==> http://parts.fixitnow.com
Forums==> http://applianceguru.com
Facebook==> http://facebook.fixitnow.com
Twitter==> http://twitter.fixitnow.com
Newsletter==> http://newsletter.fixitnow.com

Jenn-Air W30400W wall oven with a F5 error code

According to the service manual for this wall oven, the F5 error code pops up when the power to the heating element relays (either the bake or broil element) is disabled while in cook mode. This can happen when one of two things are going on with the oven:

1) Intermittent sensor or wire harness connection.

2) Intermittent contact on power relay board (PRB).

Check the sensor wire harness, undo and reconnect. If the F5 code re-appears, replace the PRB, here’s the part link==> http://www.repairclinic.com/PartDetail/Relay-Board/905230?modelNumber=W30400W

Got a pictorial guide for this job ratcheer==> http://fixitnow.com/wp/2009/05/16/jenn-air-svd48600-range-power-relay-board-and-electrode-changeout-a-pictorial-odyssey/

Not sure that’s the problem? Don’t trust ol’ Samurai? Tell you what: you buy the part through that link and, if that doesn’t fix it, you can return it within 30 days for a full refund, less shipping, even after you already installed it. That’s about as close to risk-free as you’re gonna get!

Samurai Appliance Repair Man
http://fixitnow.com

Parts==> http://parts.fixitnow.com
Forums==> http://applianceguru.com
Facebook==> http://facebook.fixitnow.com
Twitter==> http://twitter.fixitnow.com
Newsletter==> http://newsletter.fixitnow.com