Category Archives: Appliance Repair Posts

All appliance repair categories.

How to fix a GE Profile “Hydrowave” washer that doesn’t agitate properly but spins and drains okay

These GE Hydrowave line of washers, example model numbers WPRE6100 and WHRE5550K, use an inverter board to vary the speed of the motor. Instead of transmission, it uses a mode shifter. More on both of these later.

One of the common failure symptoms in this machine is that the agitation cycle gets messed up but the spin and drain continue to work normally. During agitation, you may hear a loud howling or clunking noise or the tub may be rotating with the agitator, causing overflows. The direction of the tub rotation during agitate may change between lid openings. All of these are indications of a bad Mode Shifter.

For the tech junkie out there, here’s an overview of how the mode shifter works:

Shaft and Mode Shifter Overview

The shaft and mode shifter assembly consists of the shaft and tube, mode shifter cam, and mode shifter coil. It operates in 2 distinct modes, spin and agitation. The shaft and tube transfers power to the wash system.

Motor power is transmitted to the shaft and tube from the drive belt to the drive pulley.
The drive pulley is attached to one end of the agitator shaft and the agitator is attached to the other. The tube is fixed to the washer basket at all times.

The mode shifter changes the shaft and tube from spin to agitation. In agitation mode, the tube is fixed to the platform and the agitator shaft rotates freely. In spin mode, the agitator shaft is fixed to the tube and both rotate together.

Mode shifter coil energized for agitate mode; cam teeth disengaged from drive pulley.
(Teeth engaged)

Mode shifter coil de-energized for spin/idle mode; cam teeth engaged in drive pulley.
(Teeth Dis-engaged)

Mode Shifter Operation – Agitation

The mode shifter is controlled by the motor inverter circuit.

When the washer starts the agitation cycle, the inverter energizes the mode shifter coil. The magnetic field of the coil lifts the mode shifter cam, disengaging it from the drive pulley.
Without the cam engaged, the drive pulley rotates only the agitator shaft.

At the beginning of the agitation cycle, the inverter energizes the mode shifter coil with 135 VDC (PWM) for approximately 18 seconds. This high voltage pulls the mode shifter cam up from the drive pulley.

During this time, the motor also rotates clockwise and counterclockwise in short strokes to ensure the mode shifter cam has been released from the drive pulley. This operation is called the Mode Shifter Agitate Program.

It is normal to hear metal-to-metal “clunking” sounds during this time as the cam and drive pulley disengage.

The washer runs this program when the agitation cycle first starts, when power is restored if lost during agitation or when the user restarts the washer if paused.

Once the Mode Shifter Agitate Program has completed (18 seconds), agitation begins. During agitation, the inverter continues to supply 30 VDC (PWM) to the mode shifter coil. This voltage is sufficient to hold the mode shifter cam away from the drive pulley throughout the remainder of the agitation cycle.

The inverter motor controls the speed of agitation. The agitator stroke rate is approximately 30 strokes per minute. This rate is the same for all cycles.

The speed of the motor controls the arc. At fast speed, the arc is approximately 360 degrees.
At slower speeds, the arc is substantially less. It is the distance of the arc that determines normal or gentle wash cycles.

Mode Shifter Operation – Spin

At the beginning of the spin cycle, the inverter runs a short sequence (approximately 30 seconds)
to make certain the mode shifter cam is engaged with the drive pulley. The inverter does not supply voltage to the mode shifter coil during this sequence. Since the coil is not energized, the spring loaded cam drops down into the teeth of the drive pulley.

During this time, the motor also rotates clockwise and counterclockwise in short strokes
to ensure the cam has engaged with the drive pulley. This 30 second operation is called the Mode Shifter Spin Program. It is normal to hear metal-to-metal “clunking” sounds during this time as the cam and drive pulley engage.

Notes:

If the washer is paused while in agitation, it is NORMAL to hear sounds for an additional 30 seconds as the inverter control runs the Mode Shifter Spin Program to de-energize the coil and enter a pause state.

If the washer is in agitation and power is lost, the inverter control will run the Mode Shifter Agitate Program when power is restored.

If the washer is in spin and power is lost, the inverter control will run the Mode Shifter Spin Program when power is restored.

To help prevent out-of-balance conditions, the last 10 seconds of agitation on certain cycles will be short, fast strokes to help redistribute the clothes load prior to entering the spin cycle.

Checking the Mode Shifter

Most of the problems we see in the field with the Mode Shifter are electrical rather than mechanical. The Mode Shifter has a coil inside of it with a two-wire harness, a red and yellow wire, that supplies power to the coil. The most common failure is that the Mode Shifter coil burns out, reads open on a continuity test. Disconnect the red/yellow wire harness and use your meter on Rx1K and check continuity. If it’s open, replace the Mode Shifter assembly.

Here’s what the Mode Shifter looks like, click the image to purchase:
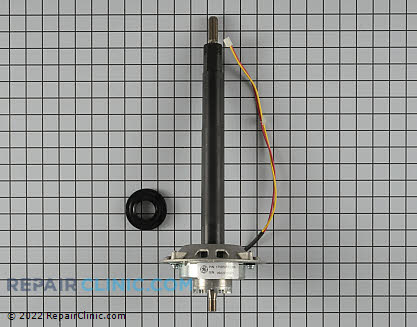
Mode Shifter
(Click image)

Return policy on all parts purchased through this website is 365-days. Even on electrical parts already installed.

To learn more about your washing machine, or to order parts, click here.

How to replace the drum rollers in a good ol’ Maytag dryer

mark wrote:

looking for instructions on replacing rollers on an older Maytag dryer model LDG7304AAE

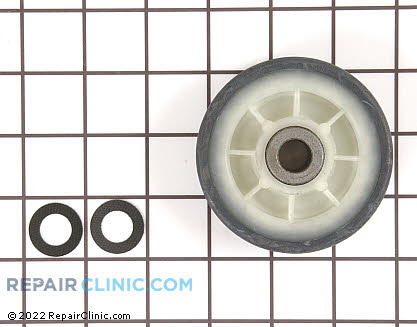
Piece of pie, tovarish! First, come git you a pair of drum rollers.

Drum Roller
(Click image)

Even though it’s usually the roller above the heating element or flame tube that usually goes out first, it’s always a good idea to replace both as long as you’re going through the trouble of tearing down the dryer to fix it.

Speaking of tearing down and fixing, this nifty repair video shows you how to replace the drum rollers in this venerable dryer:

If you run into anything weird, come start a new topic in the laundry forum at the Samurai School of Appliantology and we’ll get you going.

To learn more about your dryer, or to order parts, click here.

Burning smell in a new refrigerator: is this normal?

Baldemar wrote:

Hi Samurai,

Three days ago, my 4 month old Frigidaire side-by-side started emitting a strange smell. A bit like a melting candle, with a strong plastic smell mixed in. Investigation found the odor strongest in the freezer department. It’s strong enough to easily ruin the ice in the ice maker, but it has not affected food items. Odor is still there today. Other than this, the fridge continues to function completely as normal.

Repairman was out today and claimed that he had the exact complaint on another similarly-aged Frigidaire yesterday. Complete teardown of that unit revealed no sources of the odor. He claims a call to Electrolux lead to advise that this is normal, and relates somehow to the fridge’s defrost cycles. Their only remedy is that I need to buy and use some type of wipes to clean everything inside to remove the smell, every time it occurs.

How does this sound to you? Have you run across anything similar in your appliance repair adventures?

Any info you can provide is appreciated.
bg

Not heard of this but then this is a fairly new fridge. I’m thinking the odor is related to the defrost cycle because of the heater used then. The manufacturer may have used a different formulation of foam in the cabinet insulation that has the unintended consequence of off-gassing from the heat of the defrost heater, causing the odor. These vapors can contain carcinogens like formaldehydes and other noxious products called volatile organic compounds (VOCs).

I would call Electrolux and insist that they either correct the problem or replace the refrigerator. Living with exposure to these VOCs and even having stinky ice is simply unacceptable in a new refrigerator and is not an option. I actually would be very surprised if Electrolux takes this position; I think it’s more likely that the servicer was “ad libbing.” But let me know what they say and I’ll do an update to this post.

To learn more about your refrigerator, or to order parts, click here.

Samurai Appliance Repair Man – http://fixitnow.com
The Samurai School of Appliantology – http://appliantology.org
Find and Buy Appliance Parts – http://parts.fixitnow.com

– Posted using BlogPress from my iPad

How to fix a dishwasher that won’t fill with water

mike wrote:

dishwasher doesn`t seam to fill with water

Click below to hear my enlightening and informative reply:

Water inlet valves for all brands and models of dishwashers right here. All parts purchased through this site come with a one year warranty and you can return ’em for a refund if it doesn’t fix your problem. 8)

And here’s a cool how-to video that helps you install the new valve:

To learn more about your dishwasher, or to order parts, click here.

Samurai Appliance Repair Man – http://fixitnow.com

The Samurai School of Appliantology – http://appliantology.org

Find and Buy Appliance Parts – http://parts.fixitnow.com

How to access the impeller to clean it out or to install the impeller and motor shaft seal kit in an older-model Whirlpool-built Power Clean™ dishwasher

If your good ol’ Whirlpool-built Power Clean Filter Module (that’s what they call it) dishwasher is making weird noises, you may have something stuck down in the impeller. This how-to video shows you how to get down to it.

If you find the impeller boogared up, or the dishwasher doesn’t seem to have the oompf any more or it’s leaking, you’ll need to replace the impeller and shaft seal kit, which you can get right here.

Impeller and Seal Kit
(click image)

Samurai Appliance Repair Man – http://fixitnow.com

The Samurai School of Appliantology – http://appliantology.org

Find and Buy Appliance Parts – http://parts.fixitnow.com

Common error codes / fault codes for major appliance brands of all types

Fault Codes – Table of Contents

Range/Stove/Oven Fault Codes
Dual Convection Wall Oven
“Big Oven” 5.1 cubic ft. (Sigma Touchmatic ERC)
Dishwasher
Dryer
Washing Machine
Range/Stove/Oven Fault Codes
RST376 Gas Range Fault Codes
Range/Stove/Oven Fault Codes
Range/Stove/Oven Fault Codes Version 1
Range/Stove/Oven Fault Codes Version 2
Range/Stove/Oven Fault Codes Version 3
Range/Stove/Oven Fault Codes Version 4
Gas or Built In Oven Fault Codes
XL44 Self Clean Oven Fault Codes
“New ’99” Range/Stove/Oven Fault Codes
Range/Stove/Oven Fault Codes
WSL Model Washing Machine
Microwave Fault Codes
Dishwasher Fault Codes – From Late 1990’s forward
Range/Stove/Oven Fault Codes
Newer Style Range/Stove/Oven Fault Codes
Range/Stove/Oven Fault Codes
Gemini Range/Stove/Oven Fault Codes
Type “C” and “D” Clocks Range/Stove/Oven Fault Codes
Range/Stove/Oven Fault Codes
Stackable A/W and Dryer Fault Codes
Range/Stove/Oven Fault Codes
Range/Stove Oven – Alternative 2 Digit Fault Codes
Range/Stove Oven BES, BEP models
Range/Stove 24″ Built-In Self-Clean Wall Oven
Range/Stove/Oven Manufacturers
Range/Stove/Oven Fault Codes
Range/Stove/Oven Fault Codes starting with an E
Range/Stove/Oven Fault Codes starting with an F
Range/Stove/Oven Fault Codes
Whirlpool Polara
Range/Stove/Oven Fault Codes Non Y-Line
Range/Stove/Oven Fault Codes, Common
Range/Stove Oven 30″ Free-standing, Models SF3 & 24″ Built-In
Whirlpool Duet & Duet HT
Calypso Washing Machine
Calypso Matching Dryer

How to test the ice maker and optics sytem in a Whirlpool / Kitchenaid Optical-Controlled In-Door Ice (IDI) system

First, some pearls of wisdom from Sublime Master Kurtiusinterupptus in the Samurai School of Appliantology:

1. Remove receiver board (right side) and insert wire into plug in black/black-white wire locations . This effectively bypasses the optics for test purposes. if you have no black/blk-white wires in the plug don’t panic, just chose the two wires beside the blank hole, not on the end.

2. test for voltage at the 4 wire harness plug, black to white and black to green…should have 120vac in both places. if not, inline fuse is open or wire is broken or separated in the liner. very bad and prolly not repairable (the broken wire not the fuse).

3. if voltage is present, hookup i/m and test at the points on the motor module head previously noted L and N…should have 120vac.

4. if voltage is present, install jumper between test points T and H…this should start the icemaker on a rotation if all the above outlined conditions are true. if it doesn’t, the motor on the module is bad. if it does start, reinstall i/m and wait till it fills and parks. remove jumpers and reinstall optics receiver. icemaker should work…if not, we have proven the icemaker assembly is good and the optics must be at fault, regardless of whether the light flashes are checking good or not.

And this enhancement from Grand Master appl.tech.29501:

The optics jumper wire cam remain until the cycle has completed.

The T & H jumper must be removed from the module once the cycle has started
if you listen closely at the beginning of the cycle you will hear the contacts in the module
“click” at about the 10 sec. mark its ok to remove the jumper at this point. I usually just
count to 12 and pull it out and the module should continue the harvest.

If you do not remove the T & H jumper and the cycle completes it will either blow
the new harness fuse or the module….

Manually Starting the Harvest Cycle in the Whirlpool-Built Modular Icemaker
(click for larger view)

Also, see this illustrative wiring diagram… http://appliantology.org/gallery/image/55-manually-jumpering-the-optics-board-in-a-whirlpool-idi-system/

http://fixitnow.com/wp-content/uploads/2012/06/58403958-Whirlpool-Optical-Ice-Maker-Revised-Diagnostics.pdf

To learn more about your ice maker, or to order parts, click here.

How to fix a GE top-loading washer that agitates but won’t drain or spin

cindy wrote:

I have ge top load washer Model Number: wpsr3120w0ww It agitates on all cycles but does not drain or spin. What could the problem be? Thanks for you help.

This will either be a clogged or bad drain pump. Remove the front panel as illustrated below:

Removing the Front Panel on a GE Top-Loading Washer
Uploaded with Skitch!

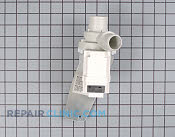
The pump is right there in front with the drain and and suction hoses attached to it. If there’s water in the drum, bail it out before removing the hoses or you’ll have that water all over your floor. Then remove the hoses from the pump and look for gookus inside the pump and the hoses. If found, clear it and try it again. If still no joy, replace the pump. Click the image below to get it. All good. 8)

Drain Pump and Motor - Part #908512
(click image to purchase)

To learn more about your washing machine, or to order parts, click here.

How to fix a dryer that won’t stay hot during the cycle or doesn’t get hot enough

Peter wrote:

We have a GE dryer model DDG7280SBLWW, S/N GL315788G. The problem is the dryer does not stay hot though the entire cycle for any of the cyles (automatic of timed). When the dryer is turned on for any cycle it initially gets hot and comes up to temperatur, vent pipe hot to touch but not burning hot, then the heat cycles off and does not heat back up. The dryer will run though the rest of the cycle and when it turns off the clotes are cold and damp. I removed the vent cap outside the house and cleanned the vent pipe and dryer to make sure we have sufficient air flow but no change in the dryer performance. We called a tech who came in and started replacing parts (i believe all the sensers, coils on the gas valve, timer & timer knob) but we still have the problem. They have sent differnet people to the house but it has been 2 weeks and the dryer still isn’t working. Wife near point of leaving. There is good and bad in all situations. Please help.

This is a classic symptom of a vent duct with too much backpressure. Vents can be clear of lint and still have excessive backpressure. You can easily test this by disconnecting the vent from the back of the dryer and run it again while observing the burner on/off cycle. I’m sure you’ll see normal heating operation.

Get the gory details on how to make a good dryer vent in this post:

Appliance Tip of the Day: The Ultimate Dryer Venting Guide

If you need more help, come see us in the Samurai School of Appliantology and start a new topic in the Laundry Forum: http://appliantology.org

Samurai Appliance Repair Man

The Samurai Family of Appliance Repair Websites

The Samurai School of Appliantology
http://appliantology.org

Find and Buy Appliance Parts
http://parts.fixitnow.com

– Posted using BlogPress from my iPad

How to fix a broken detergent dispenser on a Bosch dishwasher

jeff wrote:

the spring in my Bosch soap dispenser is broken. Can I just replace this spring or will I need to replace the entire dispenser. I cannot seem to get the spring in the door and then close it.

Depending on what exactly is broken on the dispenser, you may just need the detergent cup latch and spring kit:

Dispenser Lever - Part #935391
(click image for larger view or to purchase)

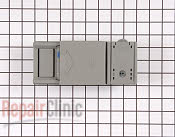
Or you may need to replace the whole dispenser:

Detergent Dispenser - Part #1055122
(click image for larger view or to purchase)

If you need help installing it, come on over to the Samurai School of Appliantology, start a new topic in the Kitchen Appliance Forum and we’ll show you how to fix it.

To learn more about your dishwasher, or to order parts, click here.

Samurai Appliance Repair Man – http://fixitnow.com

The Samurai School of Appliantology – http://appliantology.org

Find and Buy Appliance Parts – http://parts.fixitnow.com

How to fix a gas oven that won’t fire up, won’t get hot, won’t keep temperature, or goes BOOM when/if it does fire up

Kevin wrote:

Hi, Our Kenmore stove oven has delayed ignition i.e. we turn it on and perhaps 2 or 3 minutes later there’s a loud boom as the gas ignites and a smell of gas. What should we do? Thank you Kevin


Abe wrote:


I have a tappan model 30-3989-23 stove. When I turn the oven on and set the temp I hear the top console click like normal and the display shows it as being on, but the oven does not heat up.


The burners and top broiler works fine. In fact if I turn on the oven after using the broiler the oven temp does show that it has gone up. But the temp slowly goes down as the oven still does not work.

Any help would be appreciated. Thank you.


tyestick wrote:


Type of Appliance: Oven/Range/Stove


Brand: maytag

Model Number: MGR5750AAW571

Your Precious Words: No gas to oven. haven’t metered the ignitor as yet. Is it likely both oven ignitor and broiler ignitor are bad or will it be just the oven ignitor. 2003 maytag

Click the play button below to hear my answer:


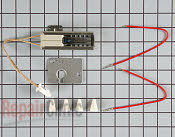
Hot Surface Glow Bar  Igniter - Part #3377
(click image to purchase)


To learn more about your range/stove/oven, or to order parts, click here.

Samurai Appliance Repair Man – http://fixitnow.com

The Samurai School of Appliantology – http://appliantology.org

Find and Buy Appliance Parts – http://parts.fixitnow.com

How to fix a Whirlpool / Kenmore direct-drive top-loading washer that fills, agitates, then goes dead

Kelly wrote:

Whirlpool Ultimate Care II Washer. Help! It fills and agitates, but stops.

Click the play button below to hear my answer:

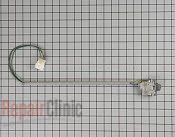
Lid Switch Assembly - Part #547225
(click image to purchase)

To learn more about your washing machine, or to order parts, click here.
Samurai Appliance Repair Man – http://fixitnow.com

The Samurai School of Appliantology – http://appliantology.org

Find and Buy Appliance Parts – http://parts.fixitnow.com