I was snowshoeing in the White Mountains when I got the call.
“Hello, Samurai? My washer is full of suds and water and it won’t pump out or run or anything! I have a baby and we need to wash diapers. Help me, Samurai Appliance Repair Man, you’re my only hope!”
I assured her I’d be there by midnight and stowed my cell phone. Then I cinched up my azz-strap and prepared to boogie– a customer was in need! I sprinted the remaining 10 miles of my hike back to the fixite do service van.
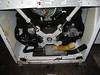
 Upon arrival, I found a tub full of water with a big head of suds and error code LD in the display. You don’t want to oversuds any washer but especially the Calypso because it’ll just cause rectal cramps. And we had a couple of ’em going on here.
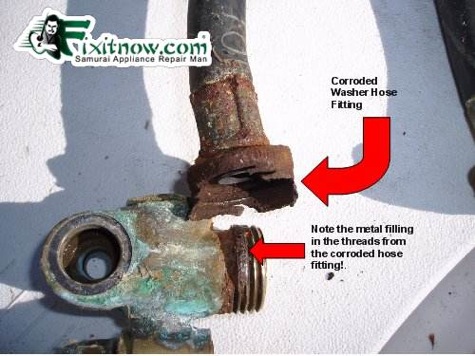
 In addition to not pumping out, the cold water side of the water inlet valve was plugged with sediment. Suddenly, the failure sequence was revealed to me in a vision: The rinse cycle defaults to cold water unless otherwise set (they were using the default cold water rinse). Since the cold water was blocked, the clothes weren’t getting rinsed, leaving detergent residue in them. So in subsequent loads of laundry, all the detergent that was already on the clothes combined with the fresh detergent added to the load, and they got that big ol’ head of foam in the tub. When pumps are sucking in sudsy water, fabric strips are prone to get wrapped around the impeller shaft and bind up the pump. And that’s what happened here.
 I popped the top so I could access the retaining screws for the front panel and the tech sheet in a pouch pasted to the inside of the front panel.
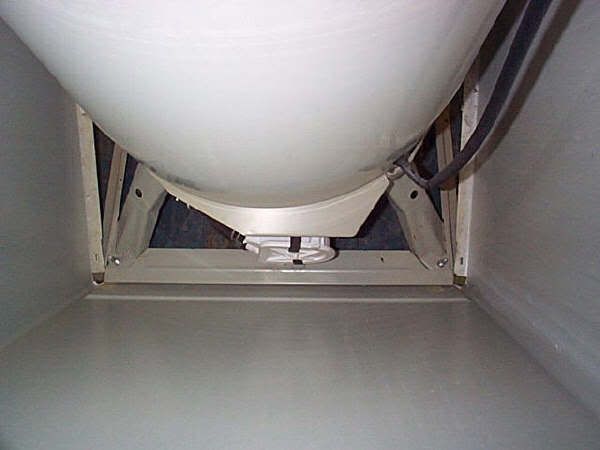
When energized, the pump would hummmmm but wouldn’t pump out. I took off the back panel and reached in and felt the drain pump motor. Warm. So the pump was trying to run but was stuck.
 Unfortunately, this medieval design requires that you tip the machine flat on its back to work on the pump. We bailed as much as we could but a gallon or so of water still came gushing out when we tipped it flat on its back. Fortunately, it was in a basement. But what if this machine was in an upstairs laundry? OY! What were the engineers smoking when they designed this washer that should have quietly died on the drawing board?
I squeezed and mashed the suction and discharge boots for big lumps, clothing. Nada.
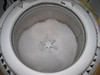
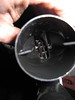 So I removed the two hoses from the pump and unclipped the pump from the motor. With the pump out, I could feast my bloodshot squinties directly on the impeller in hopes of spotting the entangling gookus that was stopping the show. Turns out the pump had strips of diaper wrapped around the impeller.
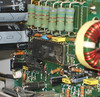
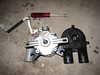 So, this pump was trashed. And to make their joy complete, you can’t buy just the pump anymore. Whirlpool redesigned the pump for this very failure. Here’s a picture of the old pump and motor assembly.
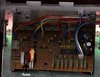
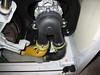
The new pump is designed to increase scouring velocity through the pump volute so, in theory, this problem should be less likely to occur again. Here’s what the new motor-pump assembly looks like:
So we went up to their compooter and surfed on over to, well, ratcheer at Fixitnow.com! At the top of the page, I entered, “Calypso” into the parts search box and then clicked the “Search for Parts” button, as illustrated below and pulled up these results.
We had the parts on order within four minutes. Parts came in three days later with just regular shipping!
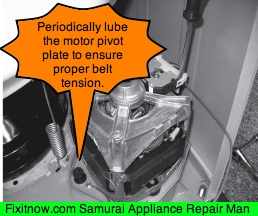
 Installing the motor-pump assembly was straight forward plug n’ chug. Just undo the obvious retaining screws and free up the wire harness. The motor comes right out. Installing the new motor-pump assembly is just as easy.
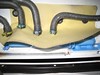 The water inlet valve was easy but was a little more involved than most. With the top raised, you need to remove each hose from the water distribution valves.
 Then undo some electrical connections and the mounting screw from the back of the washer.
The entire new water inlet valve assembly looks like this:
 Here’s the genuine factory service manual for this washer. If you own a Collapse-o washer, go ahead and buy the service manual— you’re gonna need it.
To learn more about your washing machine, or to order parts, click here.


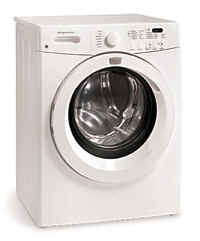 Friggidaire washer