Replacing a Water Inlet Valve for Some Common Top-Loading Washing Machines

WARNING: May cause drowsiness. Do not read this post while operating heavy machinery. Consuming alcohol while reading this post will enhance the sedative effect. Use of this post in a manner not in conformance with labeling may be a violation of Federal, State, or Local Laws, Statutes, or Regulations and may or may not subject the user to maximum enforcement under these laws, statutes, or regulations. Caveat emptor. This post is provided “as is” without any warranties. Reader assumes full responsibility. An equal opportunity post.

Maytag Dependable Care

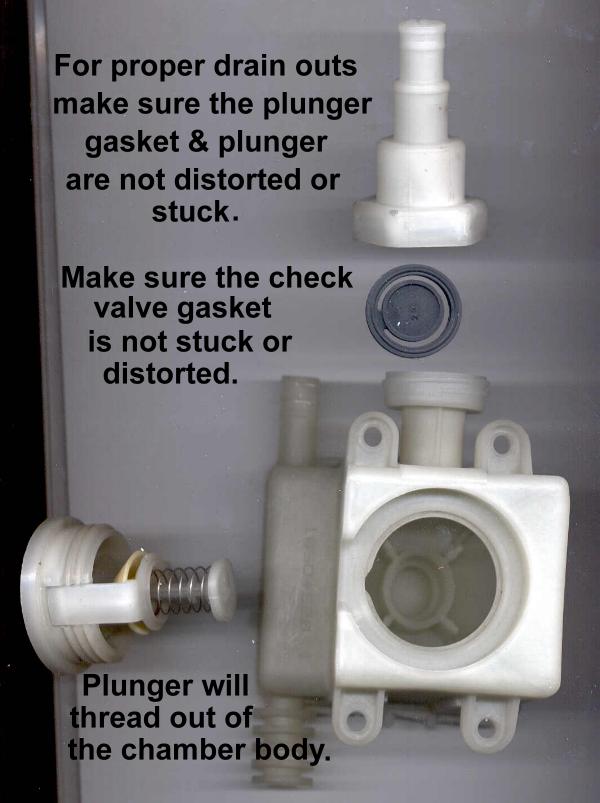
• Remove the screw holding the inlet valve mounting plate to the washer.
• Remove the two screws holding the valve to the mounting plate.
• Lift the plate up slightly and pull it out of the washer.
• Label the wires and remove them.
• Disconnect the water feed tube from the valve.
• Install the new valve.
• Flush out the water fill hoses.
• Reassemble in reverse.
• Turn on the water supply valves.
• Check for and correct any leaks.
• Restore power and test operation.

Whirlpool, Kitchen Aid, Kenmore, Roper, Estate, after 1985

• The valve will be mounted to the back of the washer with two screws. However, you must remove the valve from inside the washing machine, and this requires you remove the entire washer cabinet, which consists of the top, front and sides.
• Remove the two screws in the lower corners of the control panel.
• Lift the control panel up high enough so it stays up and back.
• Disconnect the wire harness connector.
• Using a flathead screwdriver, snap out the two gold-colored spring clips at the top of the cabinet on the left and right sides.
• The cabinet will now lift up at the back. Pull the cabinet up 10-12 inches and then slide it forward 2 inches.
• Remove the cabinet completely and set it aside.
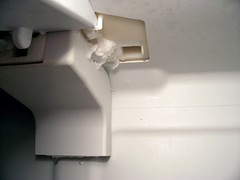
• The valve will be on the right side of the washer at the back. It’s the device to which the water fill hoses are attached.
• Label the wires from the valve and remove them.
• Remove the water feed tube(s) from the valve.
• Remove the screws holding the valve to the back panel.
• Install the new valve in the reverse order.
• Reinstall the cabinet. (Note: As you follow this procedure, do not force the cabinet in any way. When done properly, the cabinet will go back together very smoothly.) First, tilt the cabinet toward you 10-12 inches while you “walk” the cabinet back onto the lower frame of the washer. (This will be easier if you have the washer lid open so you can see inside the cabinet at the same time.) The front edge of the cabinet slides underneath the base frame, and the sides of the cabinet rest on top of the base frame.
• When the cabinet is resting on the frame squarely, check to be sure the back of the washer is aligned with the cabinet. There are two plastic strips attached to the back of the washer that must line up with the sides of the cabinet as you set the cabinet down.
• Reinstall the two spring clips at the top.
• Reattach the wire harness connector.
• Rotate the control panel back down and reinstall the two screws.
• Flush out the water fill hoses.
• Reattach the water lines.
• Turn on the water.
• Check for and correct any leaks.
• Restore power and test.

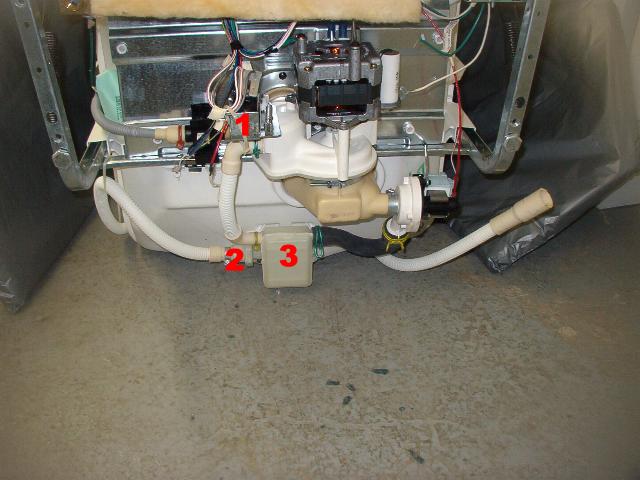
GE, Hotpoint, (valve on middle right side of washer)

• The water inlet valve is attached to a metal plate, which is attached to the washer.
• Remove the screws holding the metal plate to the washer.
• Remove the screws holding the inlet valve to the metal plate.
• Label the wires to the valve and remove them.
• Remove the water feed tube from the valve.
• Install the new valve.
• Flush out the water fill hoses.
• Reassemble in reverse.
• Turn on the water supply valves.
• Check for and correct any leaks.
• Restore power and test operation.

GE, Hotpoint, (valve inside upper control panel)

• Open the main control panel by removing two screws.
• Remove the two screws holding the valve down.
• Label the wires to the valve and remove them.
• Disconnect the water feed tube.
• Install the new valve.
• Flush out the water fill hoses.
• Reassemble in reverse.
• Turn on the water supply valves.
• Check for and correct any leaks.
• Restore power and test operation.

Frigidaire – Valve Inside Upper Control Panel

• Open the main control panel by removing two screws.
• Remove the two screws holding the valve down.
• Label the wires to the valve and remove them.
• Disconnect the water feed tube.
• Note: The new water inlet valve mounting screw holes may not be threaded. That is because the screws that hold the valve in place are self-threading. It may be easier for you to twist the old screws into the valve while the valve is out, rather than wait until it is in place. Then, remove the screws from the valve for installation.
• Reinstall the new valve in the reverse order.
• Flush out the water fill hoses.
• Reinstall the fill hoses in the proper order.
• Turn on the water supply valves.
• Check for and correct any leaks.
• Restore power and test operation.

Frigidaire – Valve in Main Body of Washer (not in control panel)

• Use a putty knife to press in the two spring clips at the front of the washer top near the sides. (You may need a flashlight to see the clips.) While you’re pressing in on the clip, lift up on the top, and will lift up like the hood of a car. Be sure to support the lid properly so it doesn’t fall backward or forward.
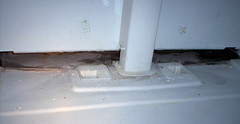
• The valve will be to your left behind the washing machine tub.
• Remove the two screws, which are on the back of the washer, holding the valve.
• From the inside of the washer, carefully pull the valve up toward the top with the wires and feed tube still attached.
• Label the wires to the valve and remove them.
• Remove the water feed tube from the valve.
• Note: The new water inlet valve mounting screw holes may not be threaded. That is because the screws that hold the valve in place are self-threading. It may be easier for you to twist the old screws into the valve while the valve is out, rather than wait until it is in place. Then, remove the screws from the valve for installation.
• Reinstall the new valve in the reverse order.
• Flush out the water fill hoses.
• Reinstall the fill hoses in the proper order.
• Turn on the water supply valves.
• Check for and correct any leaks.
• Restore power and test operation.

Others: If you didn’t see your brand and model above, and you’re sure you need to replace your water inlet valve, we can help you in the Samurai Appliance Repair Forum.

To learn more about your washing machine, or to order parts, click here.

Does Your Appliance Servicer Have the Skills Needed to Repair Your Appliances?

MESSAGE SENT THROUGH YOUR WEBSITE

name = doctor rock
country = USA
comments = I’ve been in this field 8 years as an appliance tech and hvac, and this is the best site i;ve seen. thanks for all the help.The company i work fpr provides no training of any kind,and everything i know is by hands on figuring out stuff and osmosis. thanks again. p.s how do i make a beer cooler out of a fridge?

Domo for the good words, mah bruthah. What you describe is an epidemic problem in all the skilled traded. Companies are so strapped to find good appliance repair technicians that they’ve given up training them; instead, they’re simply training monkeys to change parts.

However, I’ve recently completed preliminary work on a new microchip implant that bypasses the need for appliance-specific training. It’s called the Appliantology 3000® Total Appliance Awareness Microchip Implant (TAAMI).

Since appliance servicers have access to so many homes and can immediately report suspicious activity, federal law now mandates that all appliance service personnel working in the trade as of January 2005 must recieve the TAAMI implant as part of our nation’s war against terror. All medical expenses for the procedure are paid for by Uncle Sam. You’ll be contacted by the Department of Homeland Security in the next couple of months about arranging your surgery.

Remember, together we appliance techs are the bulwark of Democracy standing against the tyranny of those who hate our freedoms!

P.S. As for turning a fridge into a beer cooler, well, that’s kinda redundant– a fridge IS a beer cooler, some folks just choose to store other stuff in there. If you’re interested in converting a beer cooler into a keg cooler, this topic in the kitchen forum may illumine you.

Whirlpool / Kenmore Refrigerator with Chronic Water Leaking Problem Inside the Beer Compartment

Whirlpool / Kenmore Refrigerator Condensate Problem.  Click for larger view.This problem is on the top-and-bottom refrigerators (as opposed to the side-by-side). What’s going on here is that the condensate drain hole in the freezer gets plugged with ice. Once this happens, all the frost melted off the evaporator during subsequent defrost cycles can no longer drain and so spreads out on the freezer and dribbles down into the beer compartment below, as shown here (click for larger view). So, here’s whatcha do…

Frozen-over Condensate Drain Pan in a Whirlpool / Kenmore Top-Bottom Style Refrigerator.  Click for larger view.Unplug the refrigerator and pull everything outta the freezer, and I mean everything. Then, remove the bottom panel inside the freezer so you can see the condensate trough in the back of the freezer as shown here, click it for a larger view. Notice that the condensate trough is filled with ice– all that has to be cleared out. Take it easy back there, delicate parts are exposed– don’t start hacking at it with an ice pick because chances are you’ll just end up puncturing the evaporator and you’ll turn a simple, inexpensive repair into a majorly expensive one.

Defrost drain strap to prevent condensate drain freeze-ups.Once all the ice is cleared away and the condensate drain opening is cleared, then you’re ready to apply the fixite el permanenté, as they say down in Ol’ Mehico. Here’s the three-step repair procedure:

1. Come git you a defrost drain strap.

2. Install according to the supplied directions.

3. Pop a cold one and buy me one, too. Domo, compadre. 🙂

To learn more about your refrigerator, or to order parts, click here.

GE Refrigerator Class Action Lawsuit Update

Here’s an update on this on-going lawsuit from our friends at BringGoodThingstoLife.org:

Most people across the country are unaware of the National Class Action lawsuit and Settlement Argreement pertaining to 304 models of GE defective refrigerators. Consumers are for the most part totally unaware that their GE refrigerator is included in a lawsuit. The Settlement Agreement provides for refunds for previously paid repairs, refunds to those who replaced their refrigerator at their own expense, free replacement refrigerators to those who have had three moisture related repairs and continue to have problems, and free extended warranties. GE is doing everything they can to hide this information from the public and slip this lawsuit and Settlement Agreement quietly through the court. We were able to get the deadlines for registering extended to Sept. 4, 2006. Once final approval happens in court, anyone who did not get registered in time will be forever barred from any claim against GE for losses or damages. Please do what you can to help us spread the word!

Our website has been updated with the latest information. http://www.BringGoodThingsToLife.org We do have an entire new website (much better) that will be uploaded within a day or two.

We know that there are more than 304 models affected, we know that the defects are not limited to just the Bloomingtion, Indiana factory, and we know that the defects continued into 2003 models. Defective doors appear on 2004 and 2005 models. Anyone who has a model not included in the current class action – we want to hear from. We have accumulated substantial evidence of additional models that should have been included in this lawsuit. Please help to spread the word, only 7 weeks remain for hundreds of thousands of people to get their claim forms submitted in time.

We did not initiate this class action; we more or less have been “bird dogging” it so to speak as a Boston Globe reporter put it. If you check out our site, you will get picture.

Cathy Cannivet

GE has posted a webpage on this class action lawsuit as well.

To learn more about your refrigerator, or to order parts, click here.

GE Dishwasher Drainology

If your GE dishwasher isn’t draining, this cheat sheet will step you through the most common causes.

GE Dishwasher Basin PartsFirst check is underneath the sump entrance screen (item 4 in this thumbnail — click for a larger view). Remove the one or two screws on the cover to remove and check for gookus– anything that shouldn’t be there. Many GE dishwashers have a self clean filter (item 3) inside the basin, at the back. The draining water must pass through a plunger in the self clean filter body. This can get clogged up, or the plunger may twist and distort and not allow the draining water to get past. The filter can be removed from the inside and the plunger will twist out of the self cleaning body for testing/checking. For additional information on this filter plunger/piston check valve assembly, see this post. Part link for the piston check valve assembly is ratcheer.

GE Dishwasher UnderneathThe next obstacle for draining water is the back flush valve (item 2 in this thumbnail– click for a larger view). This valve can twist or distort and block the water flow as well. You’ll need to get to the drain port to check this flapper valve– it simply untwists from the self clean filter body. All hoses between the items mentioned above and the drain hose itself all the way to the house plumbing should be checked for restrictions.

Some newer GE dishwashers have a separate drain pump and motor; the older models, however, used a drain solenoid valve (item 1 in the above thumbnail). If this solenoid fails, the dishwasher won’t drain, plain and simple. If the solenoid cannot pull in the silver plunger, the drain port will not open to allow the motor and pump assembly to drain the water out. Use your ohm meter to test the continuity of the solenoid coil. You should also test to see if it’s receiving 120vac when the dishwasher is supposed to be draining. For help using a meter to make simple electrical measurements, see this post.

Some additional phun photos for you to gaze upon lovingly:

GE Dishwasher Piston Check Valve Water Flow GE Dishwasher Drain Hose Check Valve GE Dishwasher Piston Check Valve and Chamber

To learn more about your dishwasher, or to order parts, click here.

Appliance Repair Radio: How to Use the Samurai Appliance Repair Forum

listen to our podcast and you could win a million dollars!  then again, pigs may fly out of my butt.The world-famous Samurai Appliance Repair Forum is the premiere free appliance repair information resource on the web. In this steamy installment, the Samurai and Mrs. Samurai teach you how to effectively use this appliance repair oracle to get free, expert repair help. Empower yourself and tune in to this episode now!


Listen to this episode | Podcast homepage | Podcast RSS feed

GE Arctica Refrigerator Troubleshooting Tech Sheet

If you have one of those infernal GE refrigerators with the muthahboard in the back and you know how to use a multimeter to make simple electrical measurements, this tech sheet is a powerful weapon to have in your troubleshooting arsenal.

GE Refrigerator Muthaboard Tech's Cheat Sheet
(click to enlarge)

(Courtesy of Jabko, one of the Sublime Masters of Appliantology at the Samurai Appliance Repair Forum.)

To learn more about your refrigerator, or to order parts, click here.

Maytag Atlantis Washer: No Cold Water in Any Temperature Setting

The unsuspecting neophyte may be tempted to shotgun this one and just replace the water inlet valve, hoping to get lucky. And you just might get lucky IF your valve has the built-in thermistor AND the thermistor is bad. However, the temperature control board in these washers have been a troublemaker and can induce this same symptom. How can a grasshopper tell which is the real problem? By grokking this topic in the laundry forum.

To learn more about your washing machine, or to order parts, click here.

Error Codes for the Sub-Zero 600 Series Refrigerators

CODE INDICATION

05 Refrig. Cabinet Thermistor read open or shorted for 10+ seconds, or repeatedly read erratic temp’s

06 Refrig. Evaporator Thermistor read open or shorted for 10+ seconds, or repeatedly read erratic temp’s

07 Freezer Cabinet Thermistor read open or shorted for 10+ seconds, or repeatedly read erratic temp’s

08 Freezer Evaporator Thermistor read open or shorted for 10+ seconds, or repeatedly read erratic temp’s

20 Defrost Under-heat with No Voltage Feedback Through Gray/White Wire at Defrost Start

21 Defrost Overheat

22 No Voltage Feedback Through Gray/White Wire at Defrost Start

23 Defrost Overheat with No Voltage Feedback through Gray/White Wire at Defrost Start

24 Defrost Under-heat

30 Excessive Icemaker Water Valve Solenoid Activation (Exceeded 15 Seconds)

40 Excessive Freezer Compressor Run

50 Excessive Refrigerator Compressor Run

NOTE: If a refrigerator evaporator thermistor is faulty, the refrigerator compressor is not energized until compartment air temperature exceeds high offset by 5°F (3°C). SERVICE flashes and Error Code 06 is logged.

To learn more about your refrigerator, or to order parts, click here.

Appliantology Newsletter, Summer 2006 Issue is Now Out!

ouch!The long-awaited summer edition of our award-winning newsletter, Appliantology, has hit the streets and people are snapping it up. This issue explains how to help your refrigerator keep its cool and what to do when it warms up. Hurry and download it now from this link before it gets all used up (400 KB, pdf file).

If you’d like to subscribe to our newsletter so you can devour it as soon as it’s released, just click here.

Happy Fixing!

Fahrenheit or Celsius Temperature Selection in GE Ovens

If you’ve accidentally switched the oven control on your GE oven from Fahrenheit to Celsius (or vice versa), it can seem like an oven control problem; the keypad will accept some temperature selections and not others. Easy enough to switch back to the way you want it– this excerpt from your owner’s manual explains the technique:

Your oven control is set to use the Fahrenheit

temperature selections but you may change this

to use the Celsius selections.

Press the BAKE and BROIL HI/LO

pads (on double oven models use

the upper oven controls) at the same

time for 3 seconds until the display

shows SF.

Press the BROIL HI/LO pad. The

display will show F (Fahrenheit).

Press the BROIL HI/LO pad again. The

display will show C (Celsius).

Press the START pad.

NOTE: On double oven models the new setting

will be displayed for both ovens.

How to *Know* if Your Gas Oven Ignitor is Bad (without guessing)

this universal oven ignitor works great in most ranges and ovens.  click it to git it, hoss, click it to git it.Your gas oven won’t heat up and, since you’re a contemplative person who knows what you don’t know, you’d like to learn how to prove which part is bad. Come with me now and read the inspiring story of how a diligent grasshopper proved that the ignitor in his oven was bad and once again filled his kitchen with the smell of freshly-baked spam casserole.