Category Archives: Appliance Repair Posts

All appliance repair categories.

Warning: Using the self-clean feature on your oven may be hazardous to your health

Dennis wrote:

my neigbors fridgidaire oven caught on fire during selfcleaning, the fire totally destroy their house and my house, do you have any information about any fridgidaire range malfunctioning during self cleaning mode?

Using the self-clean feature on ANY oven or range is just asking for trouble. What happened with your neighbor’s Frigidaire range is one of the worst-case scenarios. More commonly, something just breaks in the oven: door lock motors seize up and won’t unlock the door, shoddily-made (but expensively-priced) electronic range control boards fail from being exposed to high temperature and humidity that they were never designed to withstand, even though they are included in self-cleaning ranges. Idiotic? You betcha! Welcome to the low-budget underworld of appliance manufacturing.

If you spend any time at all reading topics in the Kitchen Forum at the Appliantology Academy, you’ll see warning after warning to never ever ever use self-clean on your oven… unless you just like fixing broken stuff and buying appliance parts, which I have no problem with as long you’re buying your parts here! 8)

As to your specific question about Frigidaire ranges blowing up during self-clean, I don’t know of any repeating pattern of this problem unique to Frigidaire-built ranges. However, as I’ve said, ANY range is vulnerable to this during self-clean. Fun fact to know and tell: oven temperatures can exceed 900F during self-clean. At those temperatures, the volatilized carbon from the food soils would explode on contact if they were to mix with ambient air if, for example, the door was opened during self-clean. It is for this very reason that the door locks during this process. So I’m wondering if the door lock was disabled on this oven or if the door gasket was badly damaged or missing, allowing enough ambient air in to fuel an explosion.

If your oven is broken from using the self-clean or for some other reason, we can help you fix it in the Kitchen Forum. Just create a free account at the Appliantology Academy and start a new topic. We’ll help you whup up on it.

To learn more about your range or oven or to order parts, click here.

Replacing the tub bearings in a Maytag Bravo / Whirlpool Cabrio / Kenmore Oasis washer

Yep, they’re all three the same ezzact washer, all made by Whirlpool.

Two ways to go on this job: replace just the tub bearings or replace the entire tub with the bearing pre-assembled at the factory. Pro’s and con’s with each method. See this topic at the Appliantology Academy for more info ==> http://appliantology.org/topic/37050-maytag-bravo-washer-model-loud-roar-during-spin-tub-bearing-replacement/

To learn more about your washing machine, or to order parts, click here.

How to silence a Maytag Atlantis washer that makes a loud clunk and screech when it stops

Typical model number: MAV7600AWW

This topic in the Laundry forum at the Appliantology Academy has a short video clip that shows the problem. It’s basically a brake job. The needed parts are posted along with another video that show exactly how to do it. There’s also some tips on upgrading to the new, improved bearing.

http://appliantology.org/topic/36781-maytag-mav7600aww-washer-loud-cluck-after-spin-cycle/

To learn more about your washing machine, or to order parts, click here.

Perfect Appliance Gift Ideas

The Samurai has scoured both the Innernet AND the Outernet rounding up those perfect Christmas, Hanukah, Kwanzaa, and Festivus gift ideas for that special Fixer Dude or Dudette in your life.  Click the photos for more info or to purchase.


Stay warm AND safe with this Pocket Air Check combustible gas leak detector. Works with Natural and LP gas.

Gas Leak Detector - Part # 1028649 Mfg Part # 500A0300A


Multimeter.  The indispensable tool for every DIYer.  Specs: Volts AC 750 , Volts DC 1000, Amps AC 10, Resistance max. (Ohms) 2M, Continuity, Temperature -4 °F to 2498° F, Display (Counts) 2,000, Operating Temperature 32° F to 74° F (0°C to 23°C), Fuse Protection mA: 0.2A/ 250V, Power 9 V Battery (included), Size 5.5″L x 3″W x 1.5″. Temp probe included.

Multimeter - Part # 964740 Mfg Part # DM10T


Non-contact A/C voltage detector. Test for voltage without touching any bare wires. This detector works by sensing voltage through the wire’s insulation. Detector has an audible beeper and visible flashing light indicator.

Voltage Tester - Part # 1255942 Mfg Part # 1000100009


3 in 1 tool for splicing wires. Has wire strippers for stripping off insulation from the wire. Crimpers for crimping solderless connectors and bolt cutters for cutting small bolts. High quality.

Wire Splicing Tool - Part # 967613 Mfg Part # 1002


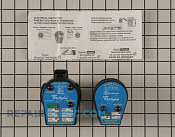
240 Volt 240 Volt outlet checkers for checking the outlets on electric ranges and dryers.

Tool - Part # 1176379 Mfg Part # 4396932


Dryer Vent Tester for testing the backpressure on a dryer vent.  Excessive backpressure is the single most common cause of overly long dryer times, repeatedly blowing thermal fuses and poor dryer performance.  A vent can be free of lint and still be bad!  Use this spiffy tool to check your dryer vent.  A must-have if you’re a pro in the trade.

Tool - Part # 1447456 Mfg Part # W10106710


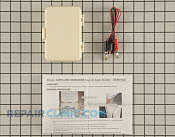
Microwave leakage detector.

Microwave Test Kit - Part # 1668485 Mfg Part # A138


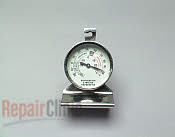
Refrigerator and freezer thermometer, temps from -20 to 80 degrees Fahrenheit. Thermometer face has special markings to show where food is safe and where it is at risk of spoilage.

Thermometer - Part # 903650 Mfg Part # 8171720


The Kill-A-Watt Energy Usage Meter. This plug-in meter allows you to track total power consumption by hour, day, week, month, or year. Also displays Voltage (V), Line Frequency (Hz), and Power Factor (PF). 15 amp maximum. No batteries required. Accepts standard 110 volt plugs, 2 or 3 prong.

Energy Usage Meter - Part # 1012487 Mfg Part # P4400


Freezer alarm, sounds if freezer temperature goes above 15 degrees.  Never lose expensive frozen foods again!

Freezer Alarm - Part # 786349 Mfg Part # 8171458


Gasohol tester.  Used to test the alcohol content in the fuel.

Gasohol Tester - Part # 1611245 Mfg Part # 795161


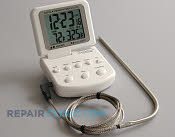
Polder 3 function thermometer: large LCD read out displays the temperature of food during cooking. Presettable HI/LOW and inside the range temperature alert. Timer: 24 hour count down and count-up. Clock: Real-time clock. Stainless steel probe. Temperature chart and battery included.

Digital Meat Thermometer - Part # 905158 Mfg Part # 601-90


Glide n Guard floor protector for appliance moving.

Floor Protectors for Moving Appliance - Part # 12914 Mfg Part # 93001


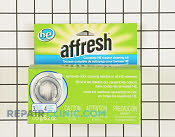
Affresh HE Washer Cleaner Pack – Use once a month to keep your HE (high efficiency) washer clean and odor-free! 3 Power Puck tablets and 4 Grit Grabber cloths per box.

Cleaner Kit - Part # 1914804 Mfg Part # W10306172


Affresh Dishwasher and Disposal Cleaner – 6 Tablets.

Dishwasher and Disposer Cleaner - Part # 1552531 Mfg Part # W10282479


Glisten dishwasher cleaner

Dishwasher Cleaner - Part # 1915432 Mfg Part # 5304482929


Refrigerator and freezer condenser coil cleaning brush with instructions. Also works great for dryer lint.

Long Handled Bristle Brush - Part # 12859 Mfg Part # 5303318693


Solid-surface range element cleaner (Sponge no longer included).

Solid Surface Element Cleaner - Part # 12830 Mfg Part # 5303310267


Vacuum cleaner attachment for condenser and dryer cleaning – This long vacuum cleaner attachment will help to clean dust and lint build-up in and around your refrigerator condenser coils underneath the refrigerator and dryer lint in the area where the lint filter is inserted. Fits 1-1/4 inch vacuum hose.

Vacuum Hose Attachment - Part # 1544893 Mfg Part # 8171579A


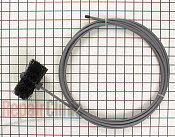
Dryer vent cleaning brush. For 4″ diameter round ducts. 20 feet long.

20 Foot Vent Cleaning Brush - Part # 424663 Mfg Part # 18001034


Complete Ceramic Cooktop Care Kit – contains a 10 ounce Cooktop Cleaner to clean and polish all glass or ceramic cooktops. A 4 ounce bottle of Cooktop Protectant. Six small cooktop cleaning pads and one larger Cooktop Protectant applicator.

Glass Cooktop Cleaner - Part # 959474 Mfg Part # 31605


Stainless steel cleaner.

Stainless Steel Cleaner - Part # 1542817 Mfg Part # 31462A


Gas grate cleaner.

Grate Cleaner - Part # 496592 Mfg Part # 316119700


Rust remover – Removes rust stains from clothes, dishes, glassware, kitchen and bathroom fixtures, painted surfaces, concrete and water softeners. 16-ounce bottle.

Rust Remover - Part # 1550725 Mfg Part # W10278629


Testing a Microwave High-Voltage Rectifier

When you’re troubleshooting a no-heat complaint in a microwave, one of the components you may need to check is the high-voltage rectifier (called a “rectumflyer” in the trade. )

Trouble is, the junction resistance on these rectumfliers is so high that doing a standard forward and reverse bias test with an ohm meter won’t tell you anything because it’ll just read open in both directions. This video shows an easy method for testing these special critters:

To learn more about your microwave oven, or to order parts, click here.

How to remove a stuck agitator from a washing machine without getting agitated

If you ever need to remove the inner basket to do a repair on a top-loading washer, one of the first things you’ll need to do is remove the agitator. For some older machines with years of accumulated gookus and crudus caked up under the agitator, this seemingly simple and mundane task can be one of the most frustrating and lumbar-damaging experiences for the tender neophyte.

Chief Master Appliantologist DurhamAppliance has put together a nice compendium of illustrated methods for removing a stubborn agitator from a top-loading washer and posted it in the Appliantology appliance repair forums. Grab a cold one and come feast your bulging peepers on the wisdom of the Masters ==> LINK.

To learn more about your washing machine, or to order parts, click here.

How to test a dryer cycling thermostat

When you run your dryer, whether gas or electric, the heat will turn on and off to maintain the temperature within the range selected on the control panel (cottons, permapress, knits, etc.). The temperature is controlled by a device called a cycling thermostat. If your dryer isn’t heating at all or is staying too hot for the entire cycle, one of the things you’ll want to check is this cycling thermostat. It’s easy! This slick how-to video shows you ezzacly how to to do it:

To learn more about your dryer, or to order parts, click here.

How to disassemble an LG dryer to remove a sock or something stuck in the blower

So your dryer powers up, you select a cycle and push start and the dryer hums for a coupla seconds and then goes quiet for a while. This usually indicates something is blocking the drum from rotating. A sock stuck in the blower would do it.

A quick test to see if you have a drum blockage problem is to simply open the door and try to turn the drum by hand. If you can’t turn the drum manually, ain’t no way that dinky motor in there is gonna turn it, ether! Can I hear an, “A-freakin-men?”

If you need to get inside the dryer to remove a sock stuck in the blower or some other rolling problem, Sublime Master john63 over at the Appliantology appliance repair forums steps us over the rice paper without a single tear or wrinkle ==> LINK

To learn more about your dryer, or to order parts, click here.

GE Refrigerator Appliantology: Dampers and Thermistors

This is the next in a series of posts I’m doing about the technology used in GE refrigerators. Understanding the basics of how these refrigerators work will give you a lot of troubleshooting insight when you’re trying to track down a problem.

For the previous post in this series on controlling and operating the fan motors in GE refrigerators, see this page.

This post gives useful tips and Fun Facts to Know and Tell for diagnosing the Damper Door and Thermistors.

Damper Door

The Damper Assembly has two motors: one to open the Damper Door and another to close it.

The Damper Door should always be either fully open or fully closed; if you ever see it in a halfway state, there’s a problem. Check it in diagnostic/self-test mode where you can run a test to open and close the damper door.

Thermistors

Thermistors are basically variable resistors whose resistance changes with temperature. They come in two flavors: Positive Temperature Coefficient (PTC) and Negative Temperature (NTC). In the PTC thermistors, the resistance increases with increasing temperature whereas in NTC thermistors, the resistance decreases as the temperature increases. All thermistors used in GE refrigerators are NTC.

Most of the side-by-side units will have four thermistors:
– attached to the evaporator coil
– freezer space
– beer section space
– damper

You can see a diagram showing thermistor locations in side-by-side units here ==> LINK

Units with the Custom Cool feature will have a fifth thermistor for the Custom Cool compartment. Lower end units will just have three thermistors.

In all units, the thermistor attached to the evaporator coil is the most troublesome.

There was a rash of problems with one of GE’s old thermistor suppliers a while back where they weren’t sealed properly so moisture got into ’em and knocked ’em out of calibration. More about that here ==> LINK

The refrigerator control has a self test for the thermistors, but it only tests if they’re open or closed. In real life, the thermistors rarely fail that way– usually they simply go out of calibration resulting in poor temperature control.

To learn more about your refrigerator, or to order parts, click here.

GE Refrigerator Appliantology: Fans, Evaporator and Condenser

This is the first in a series of posts I’m going to do about the technology used in GE refrigerators. Understanding the basics of how these refrigerators work will give you a lot of troubleshooting insight when you’re trying to track down a problem. This post explains how the fans in GE refrigerators are controlled and operated.

Like most other refrigerators, GE refrigerators have at least two fans:
– the evaporator (freezer) fan
– the condenser fan (the hot coil in the back, underneath the refrigerator)

Some up-line GE models may have an additional fan:
– in the beer section if it’s a dual evaporator unit
– in the Custom Cool® compartment, if so equipped

All fan motors used in current model GE refrigerators (includes Hotpoint brand) operate on 12 vdc. The motor speed is controlled using a technology called Pulse Width Modulation (PWM). Simple explanation of PWM: take a square wave and vary the width of the upper side of the pulses according to how fast you want the motor to turn- the longer the pulse, the faster the speed. For details on how PWM technology works, see this page ==> LINK

Currently, the condenser fan is single speed (although that’s gonna change in upcoming models) and the evaporator fan is multispeed.

Fan Wire Harness Color Code

– Yellow: PWM signal (input)
– Blue: Tachometer (output from motor)
– Red: +12 vdc supply (input)
– White: Common Ground! Can I hears an “A-freakin-men?”

The PWM wire on the fan motor harness is always the yellow wire– this is the wire that carries the signal telling the fan how fast to spin. Don’t bother trying to measure the voltage on the yellow wire with a conventional meter because the results will be meaningless.

Quick n’ Sleazy Fan Test

– White wire to the negative battery terminal
– Connect BOTH the Red and Yellow wires to the positive battery terminal.
Do not reverse the leads or you’ll blow out the sensitive electronics built into the motor assembly!

Quick Fan Diagnostic Test

– you should never hear the the fan making speed varying sounds in side-by-side units
– on top-mount units, you can sometimes hear the fan making pulsing noises

Fan Circuit on the Muthaboard

Some of the Muthaboards used in these boxes have resistors in the power circuit for the fans. These will be two resistors coming off the J2 plug on the board. If you’re looking straight at the board, the top resistor is for the evaporator fan and the bottom one for the condenser fan. They’re designed to burn out in case one of the fan motors shorts out. If this happens, you’ll need to replace BOTH the affected fan motor as well as the Muthaboard.

Part Links for Your Shopping Pleasure 😉

Evaporator and Condenser Fans ==> LINK

Muthaboard ==> LINK

To learn more about your refrigerator, or to order parts, click here.

Mailbag: Why has the ice maker in my Whirlpool Gold refrigerator stopped making ice?

Graeme wrote:

I have a Whirlpool Gold 2 Door Refrigerator with an indoor Icemaker. There was no water coming into the icemaker so I removed it to see if I coild figure out why it was not getting water and my Daughter rotated the “ice ejector” you know the thing that says “Do not rotate manually”!! SIGH!! How do I figure out how to get this back into its correct alignment and how do I figure out why there is no water coming upto the ice maker. There is water coming to the water dispenser so that means there is water coming into refrigerator. thanks for your help

Well, budrow, you’re into it for a new ice maker kit right off the bat– if it wasn’t broken before, it is now. A bad ice maker may also be the reason there’s no water getting to it. It’s the ice maker’s job to call for water.

The water inlet valve on your fridge is a dual coil valve: one side for the ice maker and the other for the dispenser. The ice maker coil could be burned out. Check the resistance with your multimeter. If it reads open, it’s bad.

You can find whatever appliance part you need through the parts search box at my website. No harm in buying and trying with our 365-day, no-hassle return policy, even on electrical parts that were installed!

Samurai Appliance Repair Man
The Samurai Appliance Repair Forums – http://appliantology.org

– Posted using BlogPress from my iPad

Whirlpool Duet Sport Washer powers up, locks door, but drum doesn’t tumble or spin; F21, F26

Here’s a typical problem description for this particular failure:

sundevil6 wrote:

My Whirlpool Duet Sport washer won’t run. Washer has power and turns on. When I start it the door will lock and then nothing else will happen. Push cancel and the the add a garment light blinks and washer won’t do anything and the door stays locked. I have to unplug it to get control of the functions again. Went through codes and found 3 of the F21’s and one F26. Tried to run the diagnostic test but it will only lock door and the light blinks continually for the rinse/spin cycle and will not advance the test.

Replaced the door switch and still the same problem. I had the tech sheet and have already tried to run diagnostic test, and it tells me nothing. I had just cleaned the pump out a month ago and when I had the original drain problems the pump would run, but loud like it was cavitating. It did have alot of blockage in it then, but none now. The pump never even comes on when I try to start, nothing happens but the door locks.

Okay, this is an interesting one and illustrates an important point about error codes and how you can’t just blindly follow them.

According to the tech sheet for this washer (located inside the washer; get it by removing the front bottom panel), F26 is “Door Switch Error: If the door has not been opened for 3 consecutive cycles or the door switch is open while the door is locked for more than 5 seconds.” The tech sheet lists these possible causes and procedures:

■ Door not opened during 3 consecutive cycles.
1. Open and close the door.
2. Verify CCU operation by running a Diagnostic Test or any cycle.

■ Door switch open while door is locked.
1. Push the door and check if it is completely closed.
2. Verify CCU operation by running a Diagnostic Test or any cycle.

Not very helpful and, as we’ll see shortly, not even close to the real problem with the machine.

F21 is the “Long Drain” error and this code could have been stored in the control from the pump problem that was fixed previously. Still not relevant to the present problem.

In any front load washer where the drum doesn’t tumble or spin, you want to keep in mind three key components in your troubleshooting: door latch assembly, motor, motor control board. Usually, the problem will be one of these three parts.

In this case, the door latch has already been replaced so scratch that one.

About the only way to test the motor is to measure the resistance of the motor windings and compare to the specification on the tech sheet.

And matt1 from the Samurai Appliance Repair Forums shares with us this technique for checking out the motor control board:

I’ve seen this problem before. Let’s do this:

– Get access to main control board.
– Find MS2 white connector with two pink wires.
– Use your volt meter to check the AC voltage supply to the board: power up then press Start.

If you see 120 vac for a few seconds but the voltage drops back 0 vac, then you have a problem with motor control. On this model, if the drum won’t turn within a few seconds at start up, the unit will freeze and door will stay locked with no water coming in.

But wait! Don’t take my word for it: you can get access to motor control board from the back of the unit– it’s easier that way– remove the motor control board and do a visual inspection. Just looking at it from the outside, you will think there is not thing abnormal. But if you actually removed the board itself from the plastic casing and look on the back, you will notice the burnt mark on the three transistor area right away. You can purchase the motor control board from this web site. I hope this helps.

Part link for the Motor Control Unit ==> Click Here

If you’re still confoosed and need more free help fixing your washer, come start a new topic in the Laundry Forum at the Samurai Appliance Repair Forums and we’ll confoose you some mo’!

To learn more about your washing machine, or to order parts, click here.

How to test the bake or broil element in an electric oven to see if it’s good or not

Everyday I get at least one email about an electric oven that won’t heat up. Many times, the person emailing me had already bought a replacement element hoping that was the problem because they didn’t know how to test their element to see whether or not it was bad in the first place.

This video shows you how to test the bake or broil element in your range so you’ll know whether you need to buy a new element or if the problem lies somewhere in the power supply circuit to the element.

BTW, the technique demonstrated below applies to anything where you’re trying to measure its resistance, whether it’s a heating element or a heat probe.

To learn more about your range/stove/oven, or to order parts, click here.

GE JTP18 convection oven door won’t open after clean cycle; DOOR error on control panel

Don wrote:

GE convection oven model # JTP18WOW1WW Oven has blinking light “door locked” Enter in any temp for oven and DOOR comes up on screeen

Thank you
Don

Issues:

1. Door will not open after self clean cycle due to motorized latch motor stuck in closed position or

2. Grinding noise during motorized lock operation.

Both issues are caused by interference of the inner vent trim slot with the latch arm as it travels to the closed position.

Correction:

Replace both the door lock motor assembly and inner vent trim.

To learn more about your range/stove/oven, or to order parts, click here.

Appliantology Newsletter, August 2011: Appliances and Disasters

Appliantology Newsletter, August 2011: Appliances and Disasters

0. Introduction
1. Can I use my appliances during a disaster?
2. Does it hurt my appliances to run them or have them plugged in while the power is blinking on and off?
3. Can running my appliances off a generator damage them?
4. What about water?
5. How do I store food safely while the power is out?
6. Epilogue

### ### ### ###

0. Introduction

With Hurricane Irene rampaging up the East Coast and record-breaking earthquakes off the coast of Virginia (or a nuclear detonation in a sea bed bunker, depending on who you’re listening to), disaster prep seemed like the obvious topic du jour for this Special Irene Edition of *Appliantology*.

### ### ### ###

1. Can I use my appliances during a disaster?

Using appliances during a storm or other disaster can be risky to the appliance because of the power going on and off, voltage spikes (more on that below), trees falling on power lines, etc.

Even most gas appliances need electricity. For example, the spark module for your gas stove burners won’t work though the burners are still usable by manually lighting the gas, which is perfectly fine; it’s safe and doesn’t hurt the appliance. Just don’t use the gas stove to heat your house!

Most modern gas ovens with hot surface ignition require 120vac to heat up the ignitor and there’s no manual bypass for that so, without a power source, you won’t have an oven.

### ### ### ###

2. Does it hurt my appliances to run them or have them plugged in while the power is blinking on and off?

Absolutely! Every time that power blinks off and goes back on, it slams your appliances with transient voltage spikes. Depending on the severity of the spikes, these can fry control boards right away or slowly degrade them over time through a process called electronic rust. After getting slammed with a finite number of such spikes, the electronic control board(s) will eventually fail (at great expense and inconvenience to you).

To prevent this unhappy and completely avoidable scenario, any appliance with an electronic control board in it– which is most of ’em today– should be plugged into a surge suppressor, not directly into the wall. Surge suppressors for common household 120vac outlets are inexpensive and you can get ’em at your local hardware store. This will provide reasonable protection for all your 120vac appliances. Read more about surge protection for your appliances here… http://fixitnow.com/?p=1523

To protect your 240vac appliances with fancy control boards during a storm, such as an electric range with a digital display, you should switch off the circuit breaker to that appliance until the coast is clear.

### ### ### ###

3. Can running my appliances off a generator damage them?

If you haven’t purchased a generator by now, it’s probably too late for the Irene event. But in case you can (or already have a generator you’re planning to use), here are some fun facts to know and tell about using generators with appliances.

For appliances with electronic control boards– which is most appliances today– you should only use generators that produce a pure sine wave output.

Most generators produce a modified sine wave output, which is not a pure sine wave but more of a stylized square wave. This is fine for motors but not good for the AC-to-DC rectifiers in appliances. The modified sine wave messes with the rectifier, making it overheat and crank out off-spec voltages for the control board. The result is often burned out rectifiers and fried control boards.

Producing a pure sine wave output requires much more sophisticated circuitry in the inverter and usually only comes with more expensive, higher-end generators. It’s a big selling point, too, so if a generator doesn’t specifically say it’s a pure sine wave generator, then it’s safest to assume that it only puts out a modified sine wave.

So, if you do not have a generator that produces a pure sine wave output, be careful to only run appliances that do not have the electronic control boards.

Oh, and one point of safety: don’t run your generator inside the house. I know, it sounds crazy to even say it but there are knuckleheads out there who do that kind of thing. Like this guy… http://fixitnow.com/?p=693

### ### ### ###

4. What about water?

Flood waters in urban areas are a lethal cocktail of sewage, petroleum products, and just about every kind of chemical you can imagine. Simple disinfection (e.g., boiling, chlorine drops, iodine drops, etc.) is woefully inadequate for this water. You can treat the water so it’s safe from pathogens and it can still be lethal because of the gasoline, mercury, or any one of thousands of other contaminants commonly found in urban Ameedika.

The other problem is that coastal flood waters will also be either salty or brackish which, in itself, renders the water undrinkable.

The best treatment for making flood waters potable is distillation. Reverse osmosis is the next best thing. If you can’t treat flood waters using either of these two methods, don’t drink it at all!

Bottled water is the best bet but there are logistical limitations on how much you can store.

### ### ### ###

5. How do I store food safely while the power is out?

I posted some information on food preservation and safety during disasters. You can read it here: http://fixitnow.com/?p=6515.

### ### ### ###

6. Epilogue

As we say in Fukushima, “Rots of ruck, GI!”

Samurai Appliance Repair Man

The Samurai Family of Appliance Repair Websites

The Samurai School of Appliantology
http://appliantology.org

Find and Buy Appliance Parts
http://parts.fixitnow.com