War Story: Maytag Washer LAT9714AAE Spins but Won’t Fill or Agitate; washer repair


Mouse Chew
Originally uploaded by Zenzoidman.

Went on a service call on a Maytag Washer today. Complaint was that the washer was dead. When I got there, I started by verifying the customer’s complaint. Turns out that the washer would, in fact, spin but would not fill with water. No fill with water == no agitate.

Now, this is a very different problem from the washer being completely dead. This illustrates an important principle of appliance repair: the first step to problem resolution is problem identification. How you gonna fix the problem if you’re not even identifying the right problem? All you’ll end up doing is fixing the wrong problem!

So, with the problem properly identified, I proceeded to troubleshoot the washer. I listened for the soft hum of the water inlet solenoid valves being energized. But all was silent. Time to break out the meter and go fishin’.

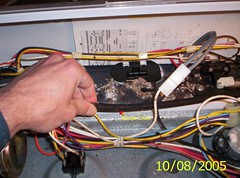
I figured the problem was gonna be either the pressure switch or the timer. So, I opened the control panel on the washer to commence my scientific inquiry. One problem was immediately apparent: I saw some fuzzy stuff inside the console that, upon closer examination, turned out to be the dearly departed remains of a wayward rodent. All that was left was clumps of hair and parts of a little mouse skeleton.

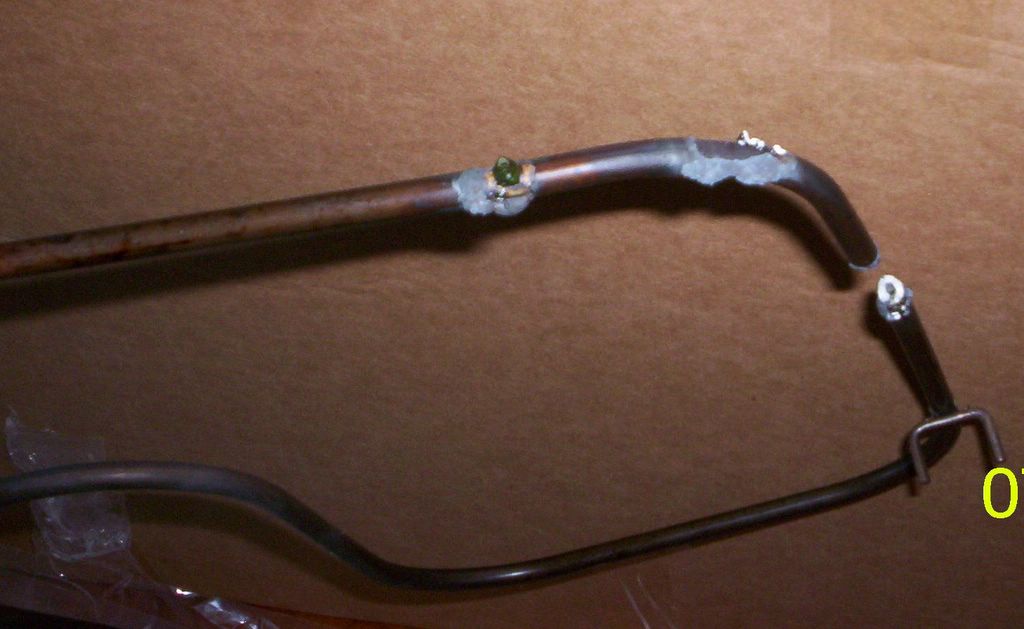
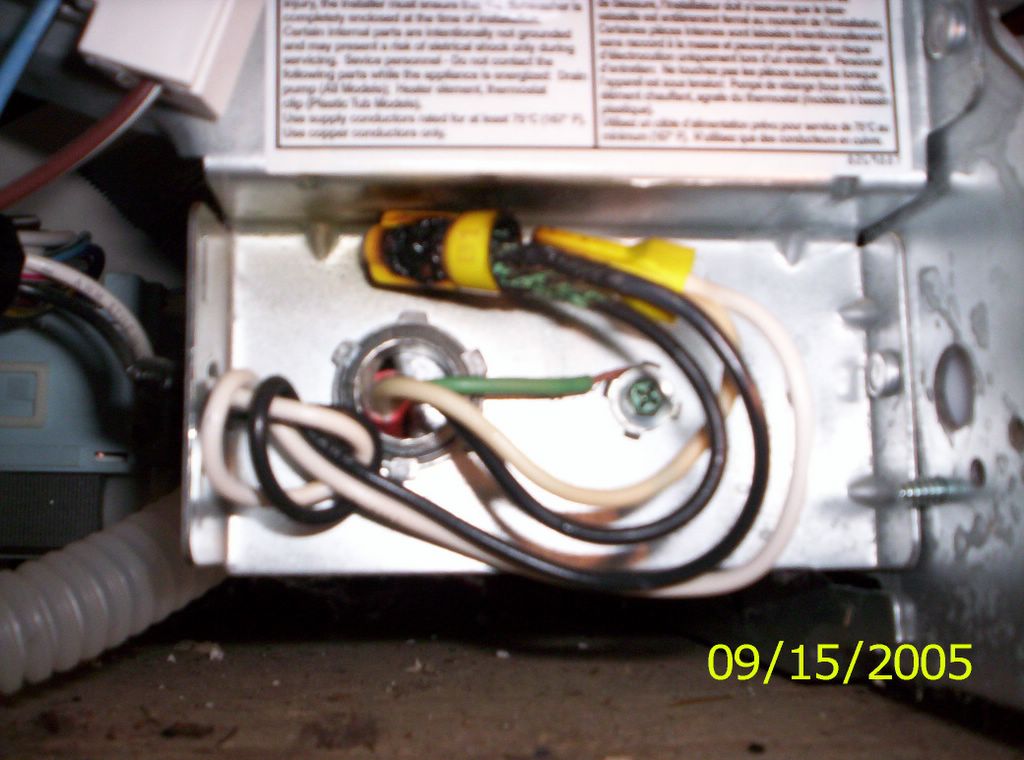
Looking closely at the air tube on the pressure switch, I could see that our deceased mouse friend must’ve gotten bored inside that control panel because he started gnawing on it. I tried to get a picture of it but my less-than-$100, 3.2 mega-pixel Kodak digital camera only allows me to get so close. You can still kinda make it out in the picture, though. Just use your imagination for the rest.

Anyway, did some more testing and found that the pressure switch wasn’t getting voltage– that’s a bad timer, slam dunk. Replaced that air tube for good measure, too. Problem solved!

Who Made my Kenmore?

Awwite now, Bubba, one thang you gotsta under-freakin’-stand is that Kenmore ain’t no manufacturer of appliances. Nawsir, “Kenmore” represents nothin’ more than a bunch of bureaucrats at Sears who sit around and write specifications of and haggle over the price for someone else to make their stuff for them. Period. There ain’t no “Kenmore” factory somewhere in Malaysia or anywhere else.

So, who makes Kenmore stuff? Well, lots o’ folks. You can tell by looking at the three digit number to the left of the decimal point in the model number. Did I slide that’n by y’too fast, Slick? Read it again: the three digit (that means individual numerals) number (that means sequence of digits) the left of (that means not to the right of) the complete model number (which is a big ol’ hairly long ace number).

Still confoosed, Grasshopper? Let’s take a ezzample. S’pose I gotsa Kenmore refrigerator (or “refirgerator” for the keyboard impaired) with a model number of 363.58097890 and I need to know who actually made that fridge. Well, using Figure 1, above, I look up the “363” portion of the model number and, lo, GE done made that fridge! It’s just like FM (freakin’ magic), ain’t it?

Appliance Service Call


Working Fall
Originally uploaded by Zenzoidman.

Driving to an appliance service call, I had to pull over for some, eh hem, essential kidney maintenance. It’s tough trying to repair an oven, refrigerator, dishwasher, or whatever, while your teeth are chattering from excessive abdominal pressure. In addition to providing that after-glow of relief, it was a nice view.

Thermador Electric Wall Oven Won’t Bake; oven repair

Went on a service call the other day on a Thermador electric wall oven; complaint – no bake. Now, wall ovens can be tricky to troubleshoot and repair so I came ready for the worst-case scenario which would require me to remove the wall oven. I packed my All Dolly wall oven cart in my Fixite Do service van and off I went.

The problem turned out to be evident right off the bat. Following Samurai’s 6th Law of Appliance Repair, “Begin troubleshooting right at the problem,” I went right to the bake element for a look-see. And, oh my, whatta look-see it was:


Burned out Bake Element in a Thermador Electric Wall Oven (click for enlargement)

As you can see, this calrod heating element finally self-destructed. “But how?” you ask, intrepidly.

“No one knows,” I answer, sagaciously.

“But I thought you were the Samurai?” you exclaim, quizzically.

“Samurai-schmamurai,” I retort, sardonically, “just replace the element already.”

At which point, you click here, obediently.

Hillstomping Update: Ragged Mountain, 10032005


My Three Nads: Samenilla, Stephenitza, and Bubba on Ragged Mountain’s Eastern Summit (click to enlarge)


Autumn Takes Root at Ragged Mountain in Danbury, NH (click to enlarge)


Brown, Smudgy Smog Layer Settles in Over the White Mountains (click to enlarge)

this is an audio post - click to play
Report from the Trail, Part 1

this is an audio post - click to play
Report from the Trail, Part 2

(Part 3 was deleted due to poor cellular phone call quality.)

this is an audio post - click to play
Report from the Trail, Part 4

Dishwasher won’t run; no power to dishwasher; dishwasher dead; dishwasher no-op; dishwasher repair

burnt power wire connnections in the power junction box on a dishwasher.  click for larger view.
(click to enlarge)

Went on a dishwasher service call the other day. Complaint was that the dishwasher was completely dead. The customer had already verified that the circuit breaker wasn’t tripped.

First thing I always do on a dead dishwasher complaint is to verify that power is available at the power junction box in the dishwasher. I removed the kickplates, then open the junction box cover and, SHAZAAM! that’s what I saw. It’s a wonder the breaker didn’t trip!

Invariably, I get asked, “What caused those wire connections to burn?” Loose electrical connections generate heat– these wire nuts were probably not installed correctly and loosened enough over time to cause the connection to burn. In this case, the connections were contained by a grounded metal box, so there was little fire danger.

To learn more about your dishwasher, or to order parts, click here.

GE / Kenmore Dishwasher Check Valve Assembly; No-Drain or Poor Draining; Check Valve; dishwasher repair

GE / Kenmore Dishwasher Check Valve Assembly; No-Drain or Poor Draining = Clean Out Check Valve and/or Replace Flapper Gasket
GE / Kenmore Dishwasher Check Valve Assembly; No-Drain or Poor Draining = Clean Out Check Valve and/or Replace Flapper Gasket (click to enlarge). Located at the very back in the middle – take off the cover.

Parts Link: Piston Assembly for Check Valve

To learn more about your dishwasher, or to order parts, click here.

Whirlpool Duet Washer: how to remove the front access panel; how to remove the boot (bellows) assembly from the tub, how to replace the boot (bellows), washer repair

Whirlpool Duet Washer:  how to remove the front access panel; how to remove the boot assembly from the tub, how to replace the boot, how to replace the door switch.  (click to enlarge)
Whirlpool Duet / Kenmore HE3t Washer: how to remove the front access panel; how to remove the boot (bellows) assembly from the tub, how to replace the boot, how to replace the door switch. (click to enlarge)

Parts Link: Front Bellows Seal (boot)

To learn more about your washing machine, or to order parts, click here.